Had a Brazilian Butt Lift abroad and planning to fly home? This guide explains preflight clearance, safe sitting strategies, DVT prevention, and complication planning so you can travel with confidence. It covers exact timelines, packing checklists, seat and cushion choices, medication protocols, and what to do if problems arise while away from your surgeon.
Why timing matters for flying after BBL
The timing of your flight home after a Brazilian Butt Lift is not just about convenience; it is a matter of medical necessity. When you undergo this procedure, your body experiences complex physiological changes that make air travel risky in the early days. The most critical factor is the survival of the transferred fat cells. These cells are fragile and require a steady supply of oxygen and nutrients from your blood to survive in their new location, a process known as “fat graft take.” When you sit on a plane seat, the direct pressure on your buttocks compresses the small blood vessels, starving the new fat of the blood it needs. If the fat cells die, you may face fat necrosis or serious infections. Living cells are significantly better at supporting your immune response than dead tissue.
The first week after surgery is the peak period for inflammation and swelling. Cabin pressure in an airplane can cause your body to retain even more fluid, putting tension on your incisions and increasing pain levels. In severe cases, this can lead to wound dehiscence, where the surgical sites begin to pull apart. Your body is in a state of high alert during these early healing stages, and adding the physical stress of travel can delay your recovery by weeks.
Safety concerns extend beyond the aesthetic results. The risk of blood clots is a major factor. Any surgical procedure increases the coagulability of your blood as part of the healing mechanism. When combined with the prolonged immobility of a flight, the risk of deep vein thrombosis (DVT) rises. These clots usually form in the legs; if a clot breaks loose and travels to the lungs, it causes a pulmonary embolism, a life-threatening condition. Longer flights correlate with a much higher risk of these complications, and dehydration from dry cabin air thickens the blood, further elevating the danger.
Timing and Surgeon Recommendations
Most plastic surgeons provide a range of dates for when it is safe to fly, varying based on the technique used and the volume of fat transferred. If you had a large volume of fat moved, or if your BMI and overall health present additional risk factors, your recovery will be more intense.
| Source or Expert | Minimum Wait Time | Maximum Recommended Delay |
|---|---|---|
| General Clinical Advice | 7 to 14 days | 2 to 6 weeks |
| Phoenix Liposuction | 7 days | 4 weeks for international |
| Surgical Images | 15 days | 6 weeks for complex cases |
| Dr. Horn (RealSelf) | 7 days | 14 days |
Many clinicians advise delaying commercial flights for at least 2 to 6 weeks if your surgery was complex, especially if you underwent a “Mommy Makeover” that included other procedures alongside the BBL. You can read more about added complications from traveling after a Brazilian butt lift | ASPS to understand these risks better.
The Danger of Early Travel
Flying within the first 24 to 72 hours is particularly dangerous. This is the window when fat embolism syndrome (FES) is most likely to occur. FES happens when fat droplets enter the bloodstream and block blood flow to the lungs or brain. It is a rare but acute complication requiring immediate hospital care. Most surgeons will not clear a patient for travel during this timeframe. Furthermore, federal aviation rules require you to sit upright during takeoff and landing; you cannot lie down across seats. This forces you to put pressure on your buttocks at the most sensitive time of graft establishment.
Criteria for Surgical Clearance
You must receive personalized surgical clearance before booking your flight. Surgeons use specific criteria to determine readiness:
Stable Vital Signs
Your blood pressure and heart rate must be within normal ranges without significant fluctuations.
Pain Management
You should be able to control discomfort using only oral medications. If you still require intravenous pain relief, you are not fit for travel.
No Signs of Infection
Your surgeon will check for fever, unusual redness, or foul-smelling drainage from incisions.
Ability to Ambulate
You must be able to walk short distances independently. This is vital for preventing blood clots during the trip.
Drain Removal
If your surgeon used drains to manage fluid buildup, these usually need to be removed before you are cleared to fly.
Once you meet these criteria, ensure you get a written letter or note stating you are cleared for travel. This is useful for airline staff if they have concerns about your health and is critical for emergency doctors if you experience issues after landing. For more tips on managing the flight, check Ask Dr. Pane! What About Flying After a Brazilian Butt Lift? for advice on specialized pillows. Always prioritize safety over the desire to get home quickly.
Preflight planning and paperwork for medical travelers
Preparing for the flight home after a Brazilian Butt Lift involves more than booking a ticket. You need a comprehensive paper trail to ensure safety and provide a roadmap for any clinician who might treat you later. Your operating surgeon must provide a formal medical summary before you leave the clinic, detailing the specific surgical technique, total volume of fat transferred to each side, a full anesthesia record, and a list of all medications administered. This summary acts as your medical identity while in transit and should list the contact information for the surgical team abroad, including a 24-hour emergency number.
Written clearance to fly is a separate necessity. This letter confirms your surgeon has evaluated you and determined you are stable for air travel. It should state that your vital signs are normal, you have no signs of active infection or DVT, and note the status of any surgical drains. This documentation is vital if an airline representative questions your fitness to fly or if you encounter a medical emergency.
Standard travel insurance policies rarely cover complications arising from elective cosmetic surgery. You must secure a specialized medical travel insurance policy that specifically includes coverage for postoperative complications, hospital readmission in both the destination and home country, and medical evacuation. If a serious complication like a pulmonary embolism occurs, the cost of a private medical flight can be astronomical. Repatriation coverage ensures you can be transported home under medical supervision if unable to board a commercial flight.
Your packing list for the return journey must be meticulous. Keep all essential items in your carry-on bag rather than checked luggage to ensure access during delays.
| Category | Essential Items |
|---|---|
| Medications | Prescription pain relief, antibiotics, and prescribed anticoagulants. |
| Circulation | Two pairs of medical-grade compression stockings and your faja. |
| Sitting Support | A high-density foam BBL pillow or an inflatable donut cushion. |
| Wound Care | Extra sterile gauze, medical tape, and antiseptic wipes. |
| Documentation | Printed operative notes, clearance letter, and pre-op photos. |
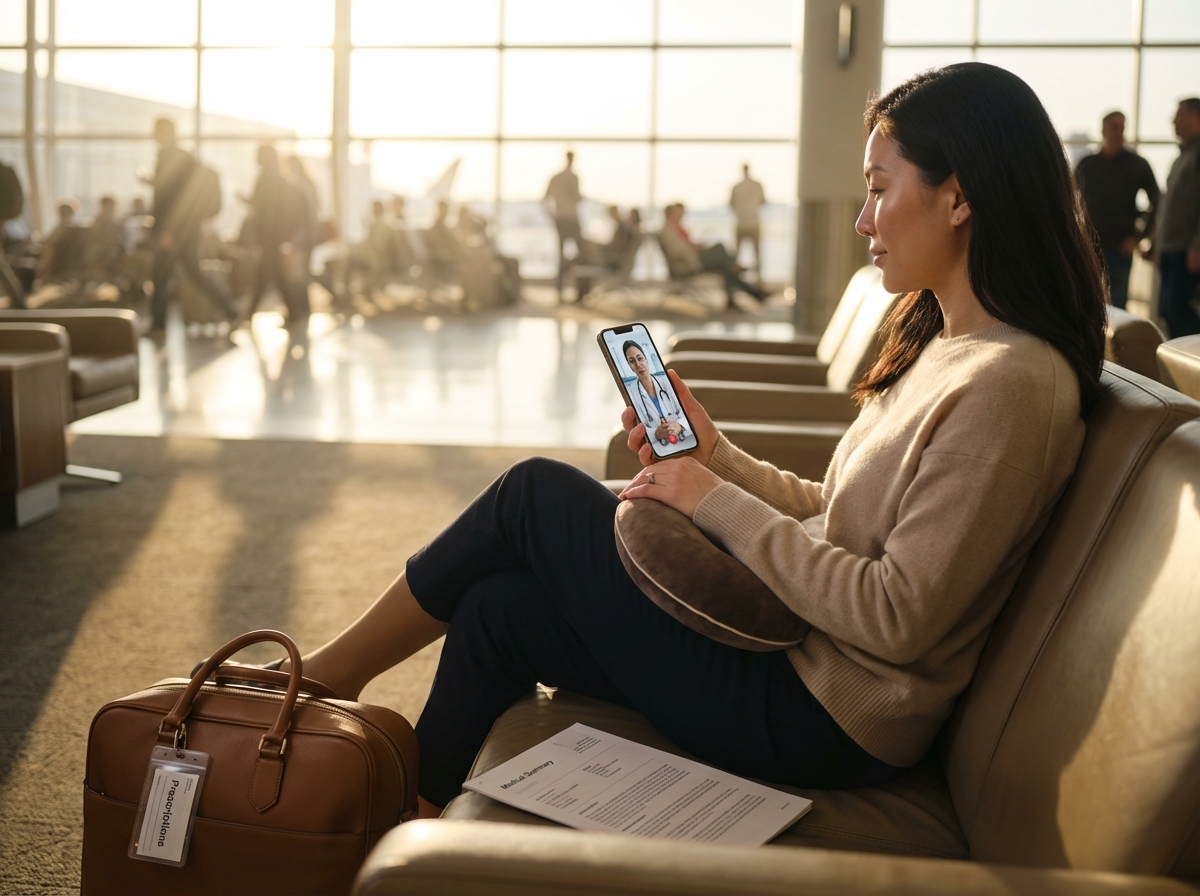
| Communication | A pre-arranged telemedicine plan with your surgeon for the first 48 hours. |
Airport Security and TSA Protocols
You can wear your compression garments through security as they are medical necessities. You do not need to remove them for screening. If you are wearing a full-body faja, it may trigger a secondary pat-down. Inform the agent that you have recently had surgery so they handle the process with care. You can also carry your BBL pillow as a medical device; most airlines do not count medical cushions against your carry-on limit.
Airline Communication
Contacting the airline before you arrive at the terminal can make the journey smoother. Request an aisle seat to allow for frequent standing and walking—the most effective way to prevent blood clots. Request preboarding to settle into your seat and position your BBL pillow without the pressure of a crowded aisle. Some airlines require a specific medical form to be filled out by your surgeon if you appear physically frail or use a wheelchair.
SURGEON CLEARANCE TEMPLATE
Patient Name: [Full Name]
Date of Surgery: [Date]
Procedure: Brazilian Butt Lift with Liposuction
To Whom It May Concern,
I have examined [Patient Name] on [Current Date] and find them
clinically stable for commercial air travel. The patient is
ambulatory and shows no signs of acute complications.
They are cleared to fly with the use of a BBL cushion
and compression garments.
Surgeon Signature: [Signature]
Clinic Contact: [Phone Number]
When emailing the airline, be direct and focus on mobility needs. You do not need to disclose every detail of your surgery, but mention you are recovering from a recent procedure.
AIRLINE ASSISTANCE REQUEST
Subject: Assistance Request for [Flight Number] - [Date]
Dear Customer Service Team,
I am traveling on the above flight following a recent medical
procedure. I am requesting an aisle seat to ensure I can
stand and move regularly for circulation. I also request
preboarding assistance to allow me to safely reach my seat.
I will be carrying a specialized medical cushion for use
during the flight. Please let me know if a formal medical
certificate is required for my check-in.
Thank you,
[Your Name]
Immediate postoperative homebound care first two weeks
The first 14 days after a Brazilian Butt Lift are the most sensitive time for your results. This period determines whether the transferred fat survives. Pressure on the buttocks during this window can lead to fat necrosis or poor symmetry. Most surgeons require a minimum stay of 7 to 14 days in the destination country before you board a plane to allow for initial wound healing and monitoring.
Pain Management for Travel
Managing pain effectively is vital for a safe flight. Use only medications prescribed by your surgeon. Avoid aspirin or ibuprofen unless specifically cleared, as these can increase bleeding risks. Keep all prescriptions in their original pharmacy bottles to facilitate airport security checks. If you were given anticoagulants to prevent clots, take them exactly as scheduled; do not skip doses during travel days. Natural supplements like arnica might help with bruising, but check with your doctor first.
Wound Care and Dressings
Wound hygiene prevents infections that could ruin your surgery. Change dressings daily or as instructed. Use sterile gauze and medical tape. If you have drains, record the output carefully; most surgeons want drains removed before you fly. Keep incision sites dry and avoid public pools or hot tubs. If a dressing becomes soaked, change it immediately. Pack extra supplies in your carry-on for travel delays.
Compression Garments
Your compression garment (faja) controls swelling and helps skin adhere to new contours. Wear it 24 hours a day during the first two weeks. For the flight, ensure the garment is snug but does not cut off circulation. You might need to wear graduated compression stockings over your legs to prevent DVT. Choose a faja with a convenient opening for bathroom breaks to minimize struggling in small airplane lavatories.
Early Mobility Protocols
Movement is your best defense against blood clots. Start walking short distances within the first 24 hours. While at your recovery house, walk for five minutes every hour. Continue this habit during your journey home. On the plane, perform ankle circles and calf pumps every 30 minutes. If the seatbelt sign is off, walk the aisle for a few minutes. Hydrate by drinking water every hour to keep blood flowing well.
Sitting Restrictions and Transfers
Total sitting avoidance is the goal for the first two weeks. When you must sit for travel, use a specialized BBL pillow to support your thighs and keep your buttocks elevated. Never sit directly on the grafted area. When lying down, stay on your stomach or side. To stand up, use your arms to push off the armrests, avoiding sliding your weight across the seat, which can damage delicate fat cells.
Reducing Swelling and Drainage
Manage swelling through diet and gentle activity. Avoid salty foods, as high sodium causes fluid retention. Drink plenty of water. Elevate your legs whenever seated with your BBL pillow to encourage lymphatic drainage. If available, professional lymphatic massage in the destination country can significantly reduce discomfort before your flight.
| Sign | Threshold/Symptom | Action Required |
|---|---|---|
| Fever | Above 100.4°F (38°C) | Contact surgeon immediately |
| Pain | Increasing or sudden sharp pain | Seek medical evaluation |
| Drainage | Pus, foul odor, or heavy bleeding | Visit local clinic or ER |
| Breathing | Shortness of breath or chest pain | Emergency Room (Call 911/Local equivalent) |
| Leg Swelling | One leg significantly larger than other | Check for DVT immediately |
Medical Red Flags Abroad
Fever, chills, or increasing redness around incisions often signal infection. Shortness of breath could indicate a pulmonary embolism—a life-threatening emergency. Do not wait for a scheduled follow-up if these symptoms appear; contact your surgeon and go to the nearest hospital. Keep the clinic’s emergency number and your medical summary with you. For more details on risks, the ASPS provides guidance on complications related to flying after a BBL.
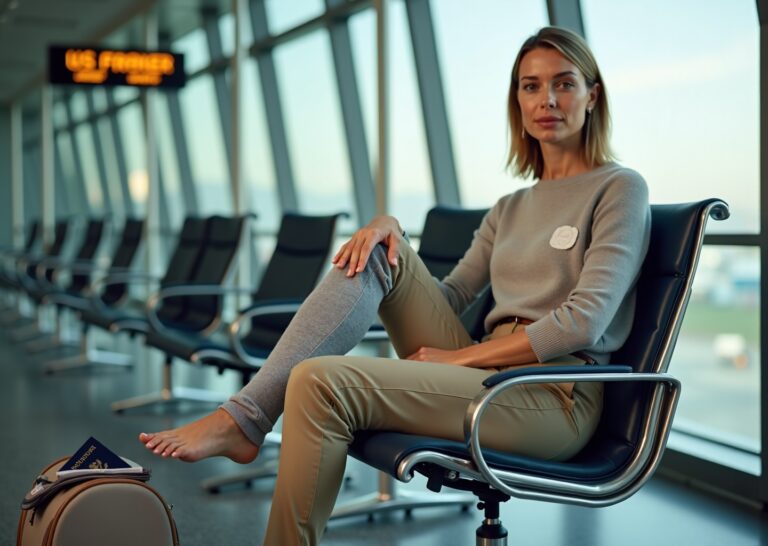
Sitting techniques and cushions that protect your results
The survival of your newly transferred fat depends almost entirely on how you manage pressure during the first few weeks. When fat is moved to the buttocks, it needs to establish a new blood supply. Any direct weight compresses the small blood vessels nourishing the grafted cells. If these cells are deprived of oxygen, they die, leading to fat necrosis (lumps, oil cysts) or infection. Your sitting strategy is about protecting your surgical investment.
Comparison of Cushion Options
Choosing the right support tool is a priority. Not all pillows provide the same level of protection.
| Cushion Type | Mechanism of Support | Best Application |
|---|---|---|
| BBL Foam Wedge | Transfers all weight to the lower thighs | Long flights and office work |
| Donut Ring | Circular support with a center hole | Short periods of relief (Not Recommended) |
| Inflatable Cushion | Adjustable air firmness | Emergency backup for travel |
| U-Shaped Pillow | Relieves pressure on the tailbone | General seating comfort |
The Thigh Weight Transfer Wedge
Often called a BBL pillow, this is the most recommended option. It sits under your hamstrings and lifts your buttocks completely off the chair, ensuring the grafted area touches nothing. A BBL pillow is your best friend during flights. It is usually made of high-density foam that does not flatten under weight.
Donut and U-Shaped Cushions
A donut ring has a hole in the middle, but the edges can press against the outer areas where fat was injected, restricting blood flow to the periphery of the graft. U-shaped wedges often do not provide enough height to keep the entire buttock area elevated. They are better than nothing but are not the gold standard.
Inflatable Options
These are convenient for carry-ons as you can adjust firmness. However, they can be unstable; if the air shifts, you might accidentally lean back onto your buttocks. They are useful as a secondary option if your primary foam pillow is too bulky.
Proper Positioning and Posture
Place the wedge under your lower thighs, just above the back of your knees. When you sit, your buttocks should hang off the back of the pillow, with feet flat on the floor to distribute weight.
Weight Shifting Techniques
Lean your torso forward slightly to move your center of gravity toward your thighs. Avoid slouching, which tilts the pelvis back and puts direct pressure on the lower fat graft. If you feel your buttocks touching the seat, readjust. Using a specially designed foam pillow helps maintain this gap.
Timed Sitting Schedules
You need a gradual progression for sitting. During the first week, avoid sitting entirely whenever possible. If you must sit to eat, limit it to ten minutes.
Week One and Two
Limit sitting to 10 or 20 minutes every hour. Spend the remaining time standing or lying on your stomach. This ensures blood flow is frequently restored. Never sit for more than 20 minutes at a time.
Week Three and Four
You may increase sitting time to 30 minutes per hour, depending on your surgeon’s guidance and skin condition. If you notice increased redness or firmness, revert to shorter intervals. Always use your cushion; most surgeons recommend avoiding direct sitting without a cushion for at least six weeks.
Practical Tips for Travel Seats
Plane and car seats are soft, allowing your body to sink in, which endangers BBL results even with a pillow.
Managing Plane Seats
Request an aisle seat for space to stand. Use a lumbar support roll or small travel pillow behind your lower back to keep your spine upright and prevent backward tilting. If allowed, recline your seat slightly to open the hip angle and reduce pressure on your thighs.
Car Travel and Transfers
Use your BBL pillow on the car seat. When entering or exiting, use your arms to support your weight and pivot on your legs—do not slide. Stop every hour for a bathroom break to walk and ensure your compression garment hasn’t shifted and created creases.
Clothing and Compression
Wear your compression garment under loose, breathable pants with an elastic waist. Tight waistbands can restrict lymphatic drainage. Ensure the garment is smooth; wrinkles can cause permanent indentations in healing fat. Check that the garment isn’t pinching at the groin or behind the knees while seated.
Air travel specific precautions and DVT prevention
Traveling home after a Brazilian Butt Lift involves significant risk of Deep Vein Thrombosis (DVT). Surgery naturally puts the body into a hypercoagulable state to aid healing. Combined with the cramped, low-pressure environment of an airplane cabin, blood flow slows, creating a perfect environment for clots.
Graduated Compression Stockings
Graduated compression stockings apply the most pressure at the ankle, decreasing upward. This helps vein valves function and keeps blood moving toward the heart. Put these on before arriving at the airport. Ensure they fit snugly without pinching or rolling down. They are mandatory for any flight longer than two hours.
Hydration and Medication Safety
Dehydration thickens blood, making it stickier. Drink water consistently (at least 8 oz every hour) and avoid caffeine or alcohol. Avoid strong sedatives or sleeping pills, as these lead to prolonged immobility. You need to be alert enough to move regularly. If your risk profile is high, your surgeon might prescribe a prophylactic dose of low molecular weight heparin. Never take aspirin or other blood thinners without a direct prescription, as they increase bleeding risks.
In-Flight Movement Protocol
Movement is your best defense. Perform calf pumps (lifting toes then heels) and ankle circles every 30 to 60 minutes while seated to engage the calf muscle pump. Walk the aisle every 60 to 90 minutes. Selecting an aisle seat is strategic, allowing you to stand without disturbing others.
| Activity | Frequency | Purpose |
|---|---|---|
| Calf Pumps | Every 30 minutes | Engages muscle pump |
| Ankle Circles | Every 30 minutes | Maintains joint mobility |
| Aisle Walking | Every 60-90 minutes | Full body circulation |
| Water Intake | 8 oz every hour | Prevents blood thickening |
Strategic Seat Selection and Packing
Prioritize an aisle seat or one with extra legroom (premium economy/bulkhead). Extra space facilitates using your BBL pillow and adjusting position. Request preboarding to arrange your cushions and store carry-ons without stress. Keep essential recovery items (meds, documentation, clearance letter) easily accessible to avoid straining incisions by reaching into overhead bins.
Ground Travel and Layovers
Risks persist after landing. For car rides or layovers, maintain vigilance. Stop every hour during car travel to walk. Recline the seat to distribute weight away from buttocks. During layovers, walk around the terminal rather than sitting. Identify a local medical facility near your layover or home in case of symptoms like sudden leg swelling, redness, or shortness of breath—signs of a clot or pulmonary embolism.
Managing Cabin Pressure and Swelling
Cabin pressure changes can increase swelling. Ensure your compression garment is worn correctly; if it feels excessively tight at cruising altitude, adjust it slightly. Elevating legs while seated helps manage lower body edema. Combining movement, hydration, and proper equipment creates a safer recovery environment.
Complication planning and arranging follow up care
Your care does not end when you land. You need a plan for local follow-up in your home city. This includes finding a professional who can monitor your healing and remove any remaining sutures or drains. Many primary care doctors are hesitant to treat surgical complications from another provider, so identifying an urgent care center or a wound specialist beforehand is a smart move.
| Visit Type | Timeline | Primary Focus |
|---|---|---|
| Initial Check | 7 Days Post-Op | Wound healing and drain removal |
| Routine Follow-up | 30 Days Post-Op | Shape assessment and swelling management |
| Long-term Review | 90 Days Post-Op | Final fat survival and results |
If you notice a fever over 100.4 degrees, sudden shortness of breath, or increasing pain, seek emergency care immediately. Do not wait for a telemedicine appointment if you suspect a blood clot or a severe infection. Having a local doctor who knows your surgical history is vital for managing added complications from traveling after a BBL.
Who pays if complications happen?
The patient is almost always responsible for the costs of treating complications once they return home. Most surgeons abroad do not cover fees for local emergency rooms or domestic specialists. This reinforces the need for specialized medical tourism insurance that covers readmission or additional procedures. Keep a copy of your surgical contract to understand exactly what the original clinic covers.
Conclusion: Returning to normal life
The safety of your BBL results depends heavily on how you handle the trip back. Pressure on the buttocks during a long flight can kill newly transferred fat cells, leading to poor results or infection. You must prioritize safety over the convenience of getting home quickly.
Most surgeons require at least 7 to 14 days before you board a plane. For international flights, waiting 2 to 4 weeks is much safer. This period allows your body to stabilize and ensures the highest risk of fat embolism has passed. You must obtain a written clearance letter from your operating surgeon before heading to the airport.
Patience is the most important part of recovery. You should avoid sitting directly on your buttocks for at least 2 to 6 weeks. Your surgeon will provide a specific timeline based on how well your fat grafts are taking. Exercise should be avoided for 6 to 8 weeks; start with light walking and gradually increase intensity only after receiving professional clearance.
It is natural to feel a rush to get home and start your new life, but your health must come first. If you feel unwell or your surgeon expresses concern, delay your travel. A few extra days in a recovery house is a small price to pay for a lifetime of safe and beautiful results. Balancing your travel needs with medical reality ensures that your BBL journey ends with the look you desired and the health you need.
References
- Added complications from traveling after a Brazilian butt lift | ASPS — All in the wrist: Improving safety for the Brazilian butt lift · Supply and demand: How surgeons are navigating the BBL boom · The media loves …
- Ask Dr. Pane! What About Flying After a Brazilian Butt Lift? — A BBL pillow, which is a specially designed foam pillow which takes the pressure off your buttocks, is an excellent postsurgical tool to help alleviate pressure …
- How to Fly After BBL: Your Complete Guide to Safe Air Travel Post … — A BBL pillow is your best friend when flying post-surgery. These specially designed cushions allow you to sit without putting direct pressure on your buttocks, …
- Traveling After a BBL: Safe and Comfortable Journeys — Flying after a Brazilian Butt Lift (BBL) requires careful attention to potential complications, especially during the recovery period. By …
- Flying After Plastic Mommy Makeover | Omaha, NE — … Butt Lift · Tummy Tuck · Liposuction · Mini Tummy Tuck · Labiaplasty · Male Body … Every one of our surgeons is ACLS certified, ensuring the highest safety …
- Flying After Liposuction: Important Guidelines for Pilots — Physical strain, lifting, or in-flight emergency response may not be safe after surgery. … procedures: Liposuction, Brazilian Butt Lift, and Fat Transfer to …
- What to Wear on Plane After BBL? | Snatched Plastic Surgery — What Bottoms Are Best After BBL? … Selecting appropriate bottoms for air travel after a Brazilian Butt Lift requires careful consideration of …
- [PDF] Plastic Surgeons Say Doing These Two Things Can Ruin Your BBL … — He asks patients to wait a minimum of 7 to 14 days before flying. While BBL pillows—which support the back of the thighs, to take pressure off the buttocks—can …
Legal Disclaimers & Brand Notices
The content provided in this article is for informational purposes only and does not constitute professional medical advice, diagnosis, or treatment. Always seek the advice of your plastic surgeon, physician, or other qualified health provider with any questions you may have regarding a medical condition, surgical procedure, or postoperative recovery. Never disregard professional medical advice or delay in seeking it because of something you have read in this article.
All product names, logos, and brands mentioned in this text are the property of their respective owners. All company, product, and service names used in this article are for identification purposes only. Use of these names, logos, and brands does not imply endorsement or affiliation.