Traveling home after a hair transplant abroad requires careful planning to protect fragile grafts and prevent complications. This article walks U.S. patients through timing decisions, packing checklists, in‑flight strategies, complication planning, and follow‑up options to ensure a safe return and optimal graft survival.
Why planning your trip home matters for graft survival
You’ve made it through the surgery. The tiny new grafts are in place, and you’re already picturing the final result. It’s easy to think the hard part is over, but one of the most critical phases of your hair transplant journey is about to begin: your trip home. That long-haul flight back to the United States isn’t just a commute; it’s a delicate medical procedure for your new hair. Getting this part wrong can compromise the thousands of dollars and hours you’ve invested. Understanding why the journey home is so crucial is the first step toward protecting your investment.
Your newly transplanted hair grafts are incredibly fragile for the first few days. They are not securely “rooted” in your scalp yet. For the first 48 to 72 hours, they survive through a process called plasmatic imbibition. Think of each graft as a tiny plant cutting placed in new soil. Before it grows roots, it survives by absorbing moisture and nutrients directly from the surrounding tissue. During this time, the grafts are only held in place by fibrin, a sticky protein that forms clots. They can be dislodged with surprising ease. Around day three, the next critical phase, inosculation, begins. This is when tiny new blood vessels from your scalp start to connect with the grafts, establishing a permanent blood supply. This is what truly anchors them. Until that connection is solid, your grafts are at their most vulnerable.
The type of procedure you had also influences your travel readiness. With Follicular Unit Extraction (FUE), where individual follicles are moved, the primary concern is protecting the recipient area from any form of contact. The donor area, with its tiny punctures, typically heals faster. For Follicular Unit Transplantation (FUT), or the “strip” method, there’s an additional factor. The donor area has a linear incision closed with sutures, which creates tension. Sitting for hours in a cramped airplane seat can increase discomfort and strain on this healing wound, making a longer local recovery period more advisable.
An airplane cabin presents a uniquely challenging environment for healing grafts. The risks are not just theoretical; they are real biological threats.
- Mechanical Damage
This is the most direct threat. A sudden jolt during turbulence, leaning your head against the window to sleep, or accidentally bumping your scalp on an overhead bin can physically dislodge grafts. In the first 72 hours, it takes very little pressure or shearing force to pop a graft out of its site. - Swelling from Cabin Pressure
Post-operative swelling is normal and typically peaks around the second or third day, exactly when many patients plan to fly. The lower cabin pressure on an airplane can cause fluid shifts in the body, potentially worsening facial and scalp swelling. This increased edema puts pressure on the tiny follicles and can impede the fragile new blood supply from forming. - Dehydration and Dry Air
Airplane cabins have extremely low humidity, often around 10-20%. This dry air can dehydrate your skin and scalp, causing the protective scabs on your recipient sites to become overly hard and tight. Dehydration also thickens your blood, which is the opposite of what you want when your body is trying to establish delicate micro-circulation to thousands of new grafts. - Infection Risk
Airports and airplanes are high-traffic public spaces. The risk of infection comes from unconsciously touching your scalp after making contact with armrests, tray tables, or bathroom doors. Your scalp is a surgical site with thousands of tiny openings, making it susceptible to bacteria. Strict hand hygiene is non-negotiable. - Immobility and Blood Clots (DVT)
Any recent surgery increases the risk of developing a deep vein thrombosis (DVT), a blood clot in the leg. Sitting still for hours on a long-haul flight further elevates this risk. A DVT is a serious medical emergency that can be life-threatening if the clot travels to the lungs.
This is why your surgeon’s advice on when to fly is so important. Reputable clinics base their recommendations on this biological timeline. A standard guideline is to wait at least 48 to 72 hours before flying. However, for larger procedures involving over 3,000 grafts, many top surgeons will insist you stay for five to seven days. This allows them to see you for a post-op check, perform the first crucial hair wash, and ensure the initial, most vulnerable healing phase is complete before you navigate the challenges of international travel.
Deciding when to fly home should be a joint decision made with your surgeon. Here is a simple checklist to guide that conversation and help you assess your readiness for the journey.
Travel Readiness Checklist
- Procedure Type
Did you have FUE or FUT? An FUT procedure may require a longer stay due to the donor incision.- Number of Grafts
Was it a small session (under 2,000 grafts) or a large one (over 3,000)? More grafts mean more trauma and swelling, favoring a longer wait.- Your General Health
Do you have any conditions that affect healing, such as diabetes or vascular disease? Are you a smoker? These factors can slow healing and increase risks.- Medications
Are you taking any anticoagulants (blood thinners)? Your surgeon needs to clear you for travel.- Flight Duration
Is your flight under 4 hours or a 12-hour transatlantic journey? The longer the flight, the greater the risks of dehydration, immobility, and accidental bumps.- Your Ability to Comply
Can you realistically follow all aftercare instructions on a long, tiring journey? This includes staying hydrated, moving around, and strictly avoiding any contact with your scalp.
Your trip home is the final, critical step in your surgical process. Treating it with the seriousness it deserves is the best way to protect your new grafts and ensure you get the result you traveled so far to achieve.
Preflight preparation and packing checklist for a safe journey
Your journey home is just as critical as the procedure itself. Proper preparation is not just about comfort; it’s about actively protecting your investment and ensuring the best possible outcome. Before you even think about zipping your suitcase, your focus should be on clear communication with your surgical team. This is your final opportunity to get direct, personalized instructions for the crucial hours ahead.
Finalize these key details with your clinic before you are discharged.
- Dressings and Headwear: Ask if you will be traveling with a bandage, surgical cap, or headband. Understand the protocol for it. Should it stay on for the entire flight? When and how should it be removed? Some clinics remove all dressings before travel, while others prefer you keep them on for protection.
- Medication Schedule: Confirm your full medication plan. Get a written schedule for antibiotics, pain relief, and any anti-inflammatory drugs. Know the exact dosages and times, especially accounting for time zone changes on your flight back to the U.S.
- Surgeon’s Note for Travel: Request a formal letter on clinic letterhead. This note should state the date and type of your procedure, confirm you are fit to fly, and list any prescribed medications or medical supplies in your carry-on. This can be invaluable for airline staff or security agents.
- Written Aftercare Instructions: Do not rely on memory. Get a printed or digital copy of your complete aftercare plan, including instructions for the first wash, sleeping positions, and activity restrictions.
- Baseline Photos: Ask the clinic to take clear, well-lit photos of your recipient and donor areas right after the procedure. These serve as a crucial baseline for your remote follow-up appointments.
- Emergency Contact: Save the clinic’s 24/7 emergency contact number, preferably on a platform like WhatsApp, for immediate access. Confirm who you should contact and what their response time is.
- U.S. Follow-Up Plan: Discuss the plan for remote follow-ups. Know when you need to send photos and what platform to use. For routine checks, telemedicine is effective, but it cannot replace an in-person exam for a suspected complication. It’s wise to ask if your clinic has any recommended physicians in the U.S. for an in-person check-up or in case of an emergency. Proactively identify a local dermatologist or specialist you can contact if needed.
Your carry-on bag is your post-operative toolkit. Every item should have a purpose related to graft protection, comfort, or safety. Do not check these items; they must be with you at all times.
Medical and Wound Care Essentials
Prescribed Medications
This includes your full course of antibiotics and any prescribed pain relievers or anti-inflammatories. Keep them in their original packaging with the pharmacy label intact. This prevents issues at security and ensures you have the correct medication.
Pain Control
Most clinics recommend acetaminophen (Tylenol) for pain management. Do not take NSAIDs like ibuprofen (Advil, Motrin) or aspirin unless specifically cleared by your surgeon, as they can increase the risk of bleeding in the early post-operative phase.
Saline Spray
A sterile saline spray is essential for keeping your grafts hydrated in the dry cabin air. Gentle misting every hour or two prevents heavy crusting and soothes the scalp. Your clinic will likely provide this or recommend a specific brand.
Sterile Supplies
Pack a small zip-top bag with extra sterile gauze pads and a small roll of medical tape. These are for minor oozing or if you need to gently reinforce a dressing per your clinic’s instructions.
Gentle Shampoo
You won’t be washing your hair on the plane, but you’ll need the correct shampoo soon after you land. Pack the specific brand your clinic recommended, often a gentle, pH-neutral formula like a baby shampoo.
Hygiene Helpers
Pack antiseptic wipes and a travel-sized hand sanitizer. Your hands must be clean before you touch anything near your head, including your pillow or saline spray bottle.
Antiemetic Medication
If you are prone to motion sickness or nausea, ask your surgeon for an antiemetic. Vomiting can cause a sudden spike in blood pressure and strain that is dangerous for new grafts.
Comfort and Protective Gear
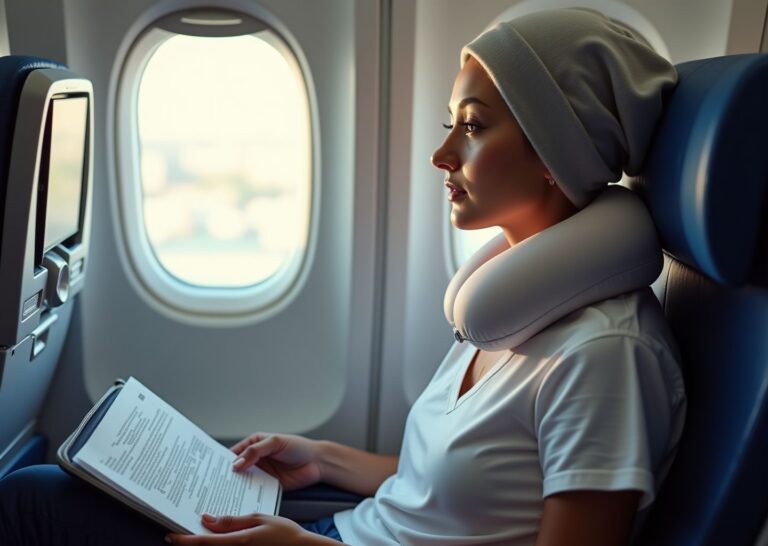
Travel Pillow Set
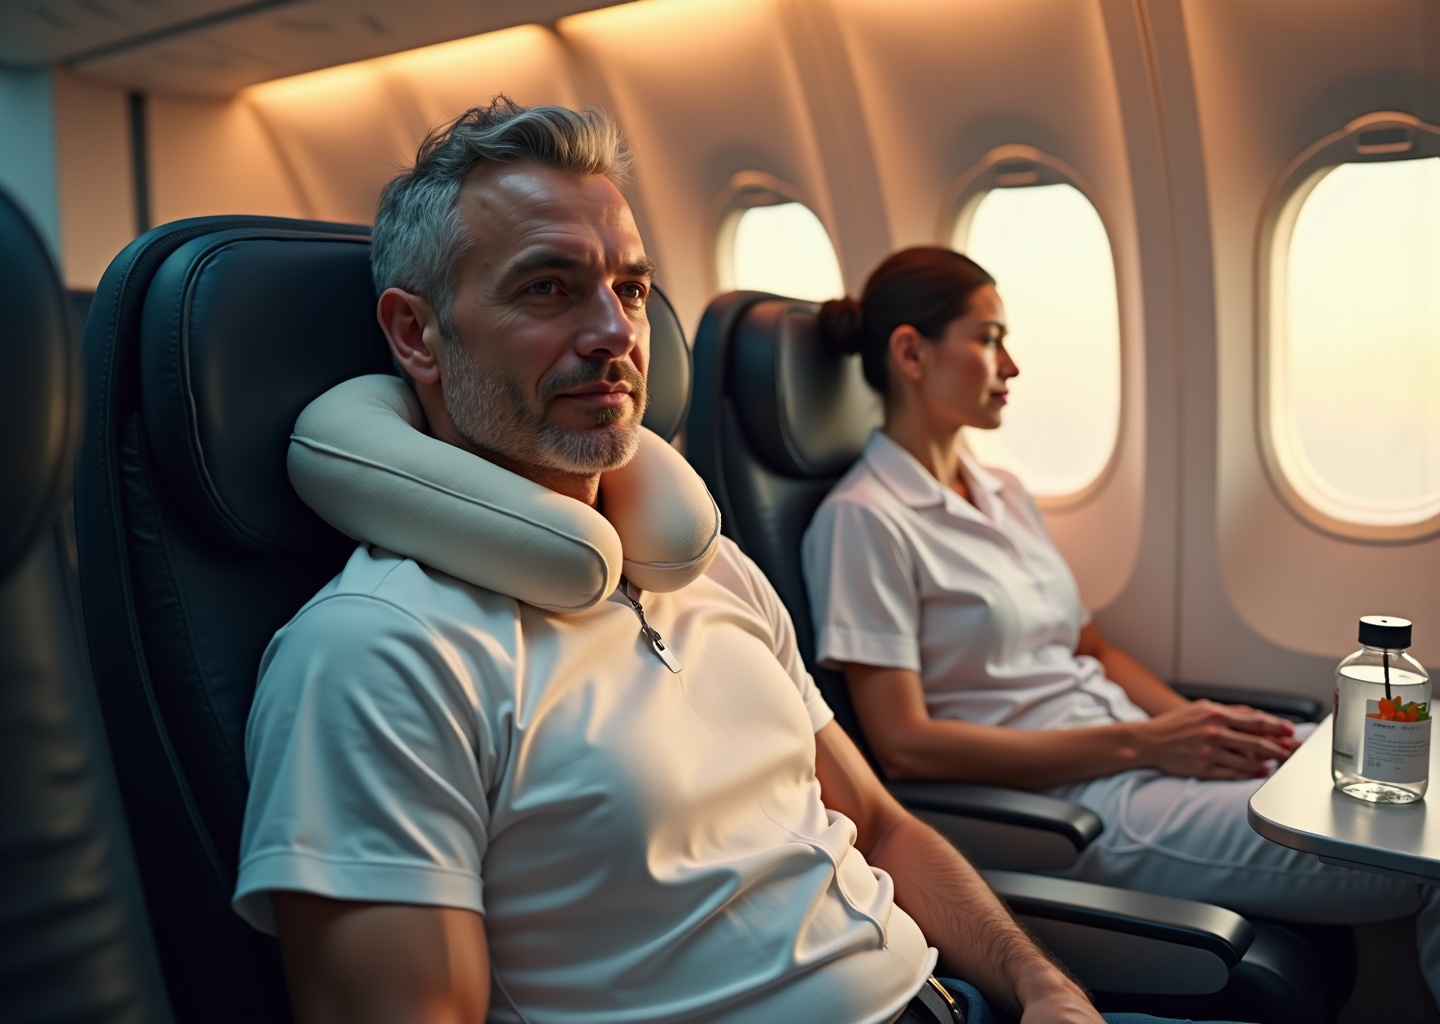
This is your most important non-medical item. A high-quality, soft neck pillow (horseshoe-shaped or inflatable) is non-negotiable. It prevents your head from slumping to the side and keeps your recipient area from making contact with the seat, window, or your shoulder. The goal is to create a buffer zone around your scalp.
Loose, Front-Opening Clothing
Wear a button-down shirt, a zip-front hoodie, or a polo shirt. Anything that can be put on and taken off without being pulled over your head is ideal. This simple choice eliminates a major risk of accidentally dislodging grafts.
Hat or Head Covering
Avoid wearing any kind of hat for the first 3 to 5 days. If you must wear one for travel, it needs to be extremely loose and approved by your surgeon. Any pressure or friction from a hat, including a soft beanie or a baseball cap, can easily dislodge delicate grafts. A loose bucket hat or a surgical cap that domes over the recipient area without making contact is the only safe option.
Sunglasses
Large sunglasses serve two purposes. They help you feel less self-conscious about any swelling or redness, and they act as a physical barrier that stops you from inadvertently rubbing your forehead or temples.
Compression Stockings
For any flight over four hours, graduated compression stockings are a wise precaution. Recent surgery increases the risk of deep vein thrombosis (DVT), and these stockings help maintain healthy blood flow in your legs during long periods of sitting.
Documentation and Logistics
Carry All Documents
Keep your passport, flight details, clinic contact information, surgeon’s travel note, and copies of your prescriptions in one easily accessible folder. Having digital copies on your phone is a great backup.
Insurance Verification
Before you leave for your surgery, confirm that your travel insurance covers complications from elective cosmetic procedures. Many standard policies do not. Look for specific medical travel insurance and consider a policy that includes medical evacuation coverage, just in case of a serious, unexpected complication.
Smarter Travel Planning
When booking your flight, choose a direct route if possible to minimize transfers and reduce overall travel stress. An aisle seat provides easier access to the lavatory and allows you to stand and stretch without disturbing other passengers. Consider paying for extra legroom for added comfort. Finally, don’t be afraid to request pre-boarding assistance from the airline. A simple request to board early allows you to get settled without being jostled by crowds in the aisle.
Printable Pre-Flight Checklist
- Clinic Confirmations
- [ ] Received written aftercare instructions
- [ ] Received surgeon’s note for travel
- [ ] Confirmed medication schedule
- [ ] Have 24/7 emergency clinic contact
- [ ] Clinic took baseline photos of scalp
- Medical Carry-On Items
- [ ] Full course of prescribed antibiotics
- [ ] Acetaminophen (Tylenol) for pain
- [ ] Sterile saline spray
- [ ] Extra sterile gauze and medical tape
- [ ] Antiseptic wipes and hand sanitizer
- [ ] Antiemetic (if needed)
- Comfort & Protection Items
- [ ] Soft neck pillow / travel pillow
- [ ] Button-down or zip-front shirt for travel day
- [ ] Sunglasses
- [ ] Compression stockings (for long flights)
- Documents
- [ ] Passport and flight information
- [ ] Physical copies of prescriptions
- [ ] Travel & medical insurance details
- Logistics
- [ ] Booked aisle seat / extra legroom
- [ ] Requested pre-boarding assistance
- [ ] Arranged for smooth, gentle airport transfer upon arrival
Here is sample wording you can ask your surgeon to use for a travel note:
To Whom It May Concern,

[Patient Name] underwent a hair transplant procedure on [Date of Surgery]. The patient is cleared for air travel as of [Date of Flight].

To ensure proper healing, the patient must avoid any pressure or contact with the scalp. They are carrying prescribed medications, including [List of Medications], for post-operative care.

Please provide any necessary assistance to ensure a safe and comfortable journey.

Sincerely,
[Surgeon's Name and Contact Information]
[Clinic Name]
In‑flight strategies and immediate arrival routine to protect grafts
The flight home is not just a journey; it’s the first active phase of your recovery. Every moment in the air and the first few hours after landing are critical for ensuring your newly transplanted grafts anchor and thrive. Think of this time as protecting a delicate garden you’ve just planted. Your primary goals are simple but non-negotiable: avoid all physical contact with the recipient area, stay hydrated, manage swelling, and keep your body comfortable.
Once you board, your first priority is creating a safe space for your head. If you requested assistance, allow the airline staff to help you with your carry-on luggage to avoid any sudden movements or straining that could raise blood pressure. As you settle into your seat, preferably an aisle seat for easy movement, the travel pillow you packed becomes your most important tool. Don’t place it behind your neck in the traditional way. Instead, use it to create a buffer that prevents the back of your head from touching the headrest, especially if your donor area is sensitive. If you need to rest or sleep, recline your seat slightly and use the pillow to support your neck, keeping your scalp clear of any surface. Avoid leaning against the window or resting your head on the tray table at all costs. These hard surfaces can easily dislodge grafts, which are extremely fragile in the first 48 to 72 hours before they establish a blood supply. The most important rule is a strict ‘no-touch’ policy. Do not scratch, pick, or even lightly touch the recipient area, no matter how much it might itch.
Your body’s internal environment is just as important as your physical positioning. The dry, recycled air in an airplane cabin is dehydrating. Your goal should be to drink plenty of water throughout the flight, aiming for at least one cup every hour. Dehydration can thicken your blood and impair microcirculation to the fragile new grafts. Steer clear of alcohol and limit caffeine, as both can contribute to dehydration and may interfere with your recovery. To prevent the risk of deep vein thrombosis (DVT), which is elevated after any surgery, you must keep your blood flowing. Perform simple in-seat exercises every 30 to 60 minutes. These include foot pumps (flexing your feet up and down) and ankle circles. If the cabin is safe to move around in, get up and walk down the aisle for a few minutes every hour. If you have them, now is the time to wear the graduated compression stockings you packed for any flight longer than four hours.
Changes in cabin pressure can worsen the facial swelling that often peaks two to three days after surgery. Keeping your head elevated is the best defense. Use your saline spray as instructed by your surgeon. A light misting every couple of hours can soothe the scalp, keep crusts from getting too hard, and relieve itching. It can also help keep your nasal passages from drying out. However, be gentle. Avoid any forceful nose-blowing or holding your breath to pop your ears, as this can increase pressure in your head. If your surgeon prescribed steroids or anti-inflammatory medication to manage swelling, stick to the schedule precisely.
Should you encounter a minor issue mid-flight, stay calm. If you have a sudden urge to sneeze or cough, try to do so with your mouth open to reduce the pressure, and hold a tissue over your mouth and nose. If you feel nauseous, take any antiemetic medication you were given immediately to prevent vomiting, which can cause jarring movements. For an unexpected nosebleed, lean forward slightly and gently pinch your nostrils. Do not tilt your head back. If you need to explain your situation to a flight attendant, a simple and direct script works best. You can say, “I’ve just had a minor medical procedure on my scalp, so I need to be very careful not to bump my head. Could you please be mindful when moving past my seat?”
Upon landing, your vigilance continues. When arranging ground transport, request a smooth ride. A private car is often better than a bumpy shuttle. You can politely inform your driver, “I’m recovering from a medical procedure, so I would appreciate it if you could please drive as smoothly as possible.” Once you arrive at your hotel or home, your first task is to rest with your head elevated on a few pillows to help gravity reduce any swelling.
Now is the time to follow the immediate arrival checklist your clinic provided. This is also the perfect moment to take clear, well-lit photographs of your recipient and donor areas. These images are invaluable for your remote follow-up appointment, providing your surgical team with a baseline of how your scalp looked immediately after travel.
Finally, be aware of the red flags that require immediate medical attention. If you experience excessive bleeding that doesn’t stop with gentle pressure, severe or escalating pain not managed by your prescribed medication, a fever over 100.4°F (38°C), or see spreading redness or pus, you need to seek urgent care locally. While rare, these symptoms can signal an infection or other complication that needs to be addressed without delay.
Frequently Asked Questions about flying after hair transplant
When is it safe to fly after a FUE or FUT hair transplant?
Most surgeons advise waiting at least 48 to 72 hours before flying to allow new grafts to stabilize. For larger sessions (over 3,000 grafts) or FUT procedures, a longer stay of 5-7 days may be recommended. Always follow your specific surgeon’s timeline.
Will the cabin pressure on the plane pop out my grafts?
No, this is a myth. Cabin pressure is not strong enough to dislodge grafts. The real in-flight risks are physical bumps to the head and the cabin’s dry environment, which can dehydrate the scalp and worsen swelling. Stay hydrated and protect your head from contact.
Can I wear a hat on the plane to cover my head?
You should avoid wearing any hat for the first 3 to 5 days. If your surgeon approves one for travel, it must be extremely loose, like a bucket hat or surgical cap that domes over the grafts without touching them. Any pressure or friction can dislodge grafts.
What pain medicines are safe, and which should I avoid?
Acetaminophen (Tylenol) is the recommended pain reliever. Strictly avoid blood-thinning medications like NSAIDs (ibuprofen, Motrin, Advil) and aspirin, as they increase bleeding risk. Only use medications cleared by your surgeon.
How can I prevent or manage swelling on the flight home?
Keep your head elevated using a travel pillow, stay well-hydrated with water, and avoid salty foods and alcohol. Follow your surgeon’s instructions regarding any prescribed anti-inflammatory medication, such as steroids. Never apply ice directly to your grafts.
Should I take medication to prevent blood clots (DVT) on a long flight?
For most healthy patients, preventative measures like in-seat exercises (ankle circles, calf pumps) and wearing compression stockings are sufficient. You must consult your surgeon about DVT medication, especially if you have specific risk factors like a history of clots, obesity, or are over 60.
What should I do if I notice pus, fever, or excessive bleeding during my trip?
These are potential signs of a complication. Contact your clinic’s 24/7 emergency line immediately. Send clear photos of the area. If you cannot reach your clinic or you feel significantly unwell, seek immediate medical attention at a local urgent care center or hospital.
How do I handle questions from customs and immigration about my surgery?
Carry a signed “fit to fly” letter from your surgeon on official clinic letterhead. It should explain you had a medical procedure, are cleared for travel, and list your prescriptions. Keep all medications in their original, labeled containers to avoid issues.
Are telemedicine follow-ups with my foreign clinic sufficient?
For routine postoperative checks, telemedicine is an excellent and effective tool. Your surgeon can assess your healing progress through high-quality photos and video calls. However, a remote consultation is not a substitute for an in-person physical exam if a serious complication is suspected.
When should I see a local U.S. physician instead of just relying on my clinic abroad?
You should seek immediate local medical care for any urgent symptoms or if you feel your concerns are not being resolved remotely. Trust your instincts. Go to a local doctor for signs of a spreading infection (increasing redness, warmth, pain, or a fever), uncontrolled bleeding, or severe pain. Your health and safety are the top priority.
Final recommendations and actionable recovery plan to take home
You’ve made it through the surgery and the initial recovery. Now, the journey home begins, and with it, the most critical phase for your new grafts. This final chapter translates all the advice into a clear, actionable plan to ensure your investment thrives. Think of this as your roadmap from the clinic chair back to your daily life, with every step designed to protect your results.
Your Post-Op Recovery Timeline
Day of Surgery and First 24 Hours
Actions: Your primary job is to rest. Keep your head elevated at a 45-degree angle, even while sleeping, to minimize swelling. Use a travel pillow to support your neck without putting pressure on the recipient or donor areas. Begin taking any prescribed antibiotics and pain medication exactly as directed by your surgeon. Start using the sterile saline spray on the recipient area every 1-2 hours to keep grafts moist and prevent heavy crusting. Drink plenty of water and avoid alcohol.
Red Flags: Persistent, oozing bleeding that soaks through gauze. Severe pain that is not controlled by your prescribed medication. Nausea or vomiting from anesthesia.
48–72 Hours After Surgery (The Travel Window)
Actions: This is the most common time for patients to fly home. Continue with your medication schedule and saline sprays. At the airport and on the plane, be hyper-aware of your surroundings to avoid bumping your head. Use your neck pillow to create a buffer between your head and the seatback. Stay hydrated with water throughout the flight. Perform gentle in-seat leg exercises like ankle circles to promote circulation. Upon arrival, go directly to your place of rest and elevate your head again.
Red Flags: A fever above 100.4°F (38°C). Any yellow or green pus from the scalp. Spreading redness or warmth around the surgical sites, which could signal an infection.
First 2 Weeks After Surgery
Actions: Follow your clinic’s instructions for the first hair wash, which typically occurs around day 3-4. This is a gentle process, usually involving dabbing with a special shampoo, not scrubbing. The crusts around each graft will begin to soften and fall away naturally over the next 7-14 days. Do not pick at them. Avoid strenuous exercise, swimming, saunas, and direct sun exposure on your scalp. You can usually wear a very loose-fitting hat after the first 5-7 days if your surgeon approves.
Red Flags: Crusts that are not loosening after 10-14 days. Any new, painful pimples or cysts in the recipient area. Continued significant swelling past the first week.
Follow-Up and Monitoring from Home
Your care doesn’t end when you leave the clinic. Meticulous follow-up is key to a successful outcome.
Telemedicine Check-Ins
Your clinic will likely schedule remote check-ins. Be prepared for these key milestones:
48–72 Hours Post-Op: A quick check to ensure your immediate recovery and travel went smoothly.
1 Week Post-Op: To assess healing, swelling, and the condition of the crusts.
1 Month Post-Op: To check on the donor area’s healing and discuss the upcoming shedding phase.
How to Take Follow-Up Photos
Good photos are essential for your surgeon to assess your progress. Use your smartphone in a well-lit room with diffuse, natural light (near a window is best). Avoid direct overhead lights or flash, which create glare. Send clear, focused pictures of:
– The entire hairline from the front.
– A top-down view of the entire recipient area.
– Left and right side views.
– A close-up of the donor area in the back.
When to See a U.S. Doctor
Schedule an in-person appointment with a U.S. dermatologist or hair restoration specialist if you experience any signs of infection that your overseas clinic cannot manage remotely, or if you have concerns about your healing and need a second opinion. It’s wise to identify a potential local doctor before you even travel.
Managing Your Expectations for the Year Ahead
The timeline for hair growth is a marathon, not a sprint. Understanding the phases helps reduce anxiety.
- Weeks 1–2: Healing. Scabs and crusts will form and then flake off.
- Weeks 2–8: Shedding (Shock Loss). The transplanted hairs will fall out. This is a normal and expected part of the cycle. The follicle is safe beneath the skin.
- Months 3–4: Early Regrowth. You may start to see fine, thin hairs emerging.
- Months 6–9: Visible Progress. Hair will become longer and thicker, and you’ll notice a significant increase in density.
- Months 12–18: Final Result. Your hair will reach its full thickness and maturity, revealing the final outcome of your procedure.
Final Safety Reminders and Emergency Communication
If you notice a potential complication, clear and immediate communication is vital.
When to Contact Your Surgeon
For non-emergency issues like questions about your aftercare routine, mild swelling, or concerns about crusting, send a message to your clinic. Use a clear template like this:
Subject: URGENT Post-Op Question - [Your Name] - [Surgery Date]

Patient Name: [Your Full Name]
Date of Surgery: [MM/DD/YYYY]
Graft Count: [Number of Grafts]

Dear Dr. [Surgeon's Name],

I am writing to you with a concern about [describe the symptom clearly and concisely, e.g., "increased redness on the left side of my donor area"].

I have attached several clear photos taken today in good lighting for your review.

Please advise on the next steps.

Thank you,
[Your Name]
[Your Phone Number]
When to Seek Immediate U.S. Medical Help
Go to an emergency room or urgent care facility immediately for any of the following:
- A high fever that doesn’t come down.
- Uncontrolled bleeding.
- Severe, worsening pain.
- Rapidly spreading redness, warmth, or swelling on your scalp or face.
- Any signs of a severe allergic reaction, like difficulty breathing.
After you are stable, inform your operating surgeon.
Your journey to hair restoration is a significant investment in yourself. Protect it by being a proactive and diligent patient. Plan your return journey with care, follow your surgeon’s aftercare instructions without deviation, and never hesitate to reach out for help if something feels wrong. A successful outcome is built on a partnership between a skilled surgeon and a well-prepared patient.
References
- Is Turkey Safe for a Hair Transplant in 2025? A Patient Safety Guide — Smile Hair Clinic
- The Best Countries for Hair Transplants 2025: Costs, Risks & Safety — Hims
- The Allures and the Alarms of the Hair Transplant Tourism Industry — PubMed
- Hair Transplant Results by Country 2025: Your Global Guide — WMedTour
- Hair Transplant Statistics and Facts (2025) — Market.us Media
- ISHRS World Hair Transplant Repair Day: 2025 in Romania — International Society of Hair Restoration Surgery (ISHRS)
- Hair Transplant Statistics In 2025: What’s Changing? — Affordable Hair Transplants
- 2025 Hair Restoration Trends & Data: Ultimate Statistics Report — Carolina Cosmetic Surgery
Legal Disclaimers & Brand Notices
Medical Disclaimer: The content of this article is provided for informational and educational purposes only. It is not intended to be a substitute for professional medical advice, diagnosis, or treatment. Readers should always seek the advice of a qualified healthcare provider with any questions they may have regarding a medical condition, procedure, or recovery plan. Never disregard professional medical advice or delay in seeking it because of something you have read in this content. Reliance on any information provided by this article is solely at your own risk.
Trademark Acknowledgement: All product names, logos, and brands mentioned herein (including but not limited to Tylenol, Advil, and Motrin) are trademarks or registered trademarks of their respective owners. The use of these names, trademarks, and brands does not imply endorsement, affiliation, or sponsorship by the trademark holders.