Traveling home after a hair transplant requires planning to protect fragile grafts and manage swelling. This article explains when and how to wear hats after surgery, best practices for sleeping upright on planes, complication prevention, and travel-ready aftercare steps for patients returning from clinics abroad. Follow clear timelines, packing tips, and safety checks to reduce risks on the flight home.
How hair grafts heal and when travel becomes safe
The timing of your flight home is a critical decision. Most clinics recommend waiting at least 48 to 72 hours after an FUE procedure. This allows for a crucial post-operative check-up where your surgical team can assess the grafts and give you the all-clear for travel. For FUT (strip) surgery, the timeline is often longer; many surgeons advise waiting 7 to 14 days, ideally until after your sutures are removed. Flying too soon can increase swelling and discomfort, so always follow the specific timeline provided by your surgeon.
Once you are cleared to fly, navigating the journey is all about protecting your investment. The two biggest hurdles you’ll face on the plane are figuring out how to cover your head without harming the grafts and how to get some rest without putting them at risk. It might seem daunting, but with a little planning, you can travel home safely and comfortably.
Let’s start with hats. Your first instinct might be to cover up your scalp, but this needs to be done carefully. The wrong hat, or even the right hat worn at the wrong time, can cause serious problems. Pressure and friction are the enemies of new grafts. They can physically dislodge the follicles before they have a chance to anchor, which takes about 7 to 10 days. Trapped moisture from sweat can also create a breeding ground for bacteria, increasing your infection risk.
Timing is everything. For the first 48 to 72 hours, you should only wear the specific surgical cap or loose dressing provided by your clinic. Many surgeons will remove this at your final check-up before you fly. After that, and for the first week, your only option is an extremely loose hat. Think soft bucket hats, oversized beanies made of cotton, or a clean, disposable surgical bouffant cap. The material should be breathable, and the hat should sit so loosely that it makes almost no contact with the recipient area. If you had an FUT procedure, you’ll also need to be mindful of the suture line in the donor area, ensuring no band or seam rubs against it.
Choosing and Using Your Travel Hat
The ideal travel hat is soft, lightweight, and has no tight bands or rough internal seams. It’s a good idea to inspect any hat you plan to wear and even cut out any tags or labels that could snag a graft. When you put it on, don’t just pull it down over your head. The safest method is to place the back of the hat on the back of your head first, then gently lower the front down over your forehead, avoiding any sliding motion across the grafts. To take it off, reverse the process by lifting from the front and sliding it backward. Pack at least two or three clean hats in your carry-on. If one gets dirty or feels damp, you can switch to a fresh one. This simple step is huge for preventing infection while in transit.
Now, for the second challenge: sleeping on the plane. Staying upright is non-negotiable. For the first week after your surgery, you need to keep your head elevated at a 30 to 45-degree angle to help control swelling. Gravity is your friend here, helping to drain fluid away from your scalp and face. Lying flat or letting your head slump forward will do the opposite, potentially leading to significant facial swelling by the time you land.
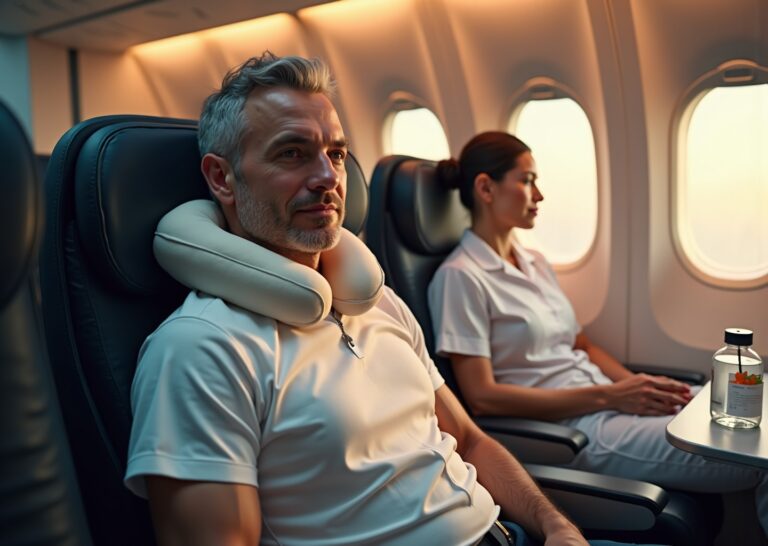
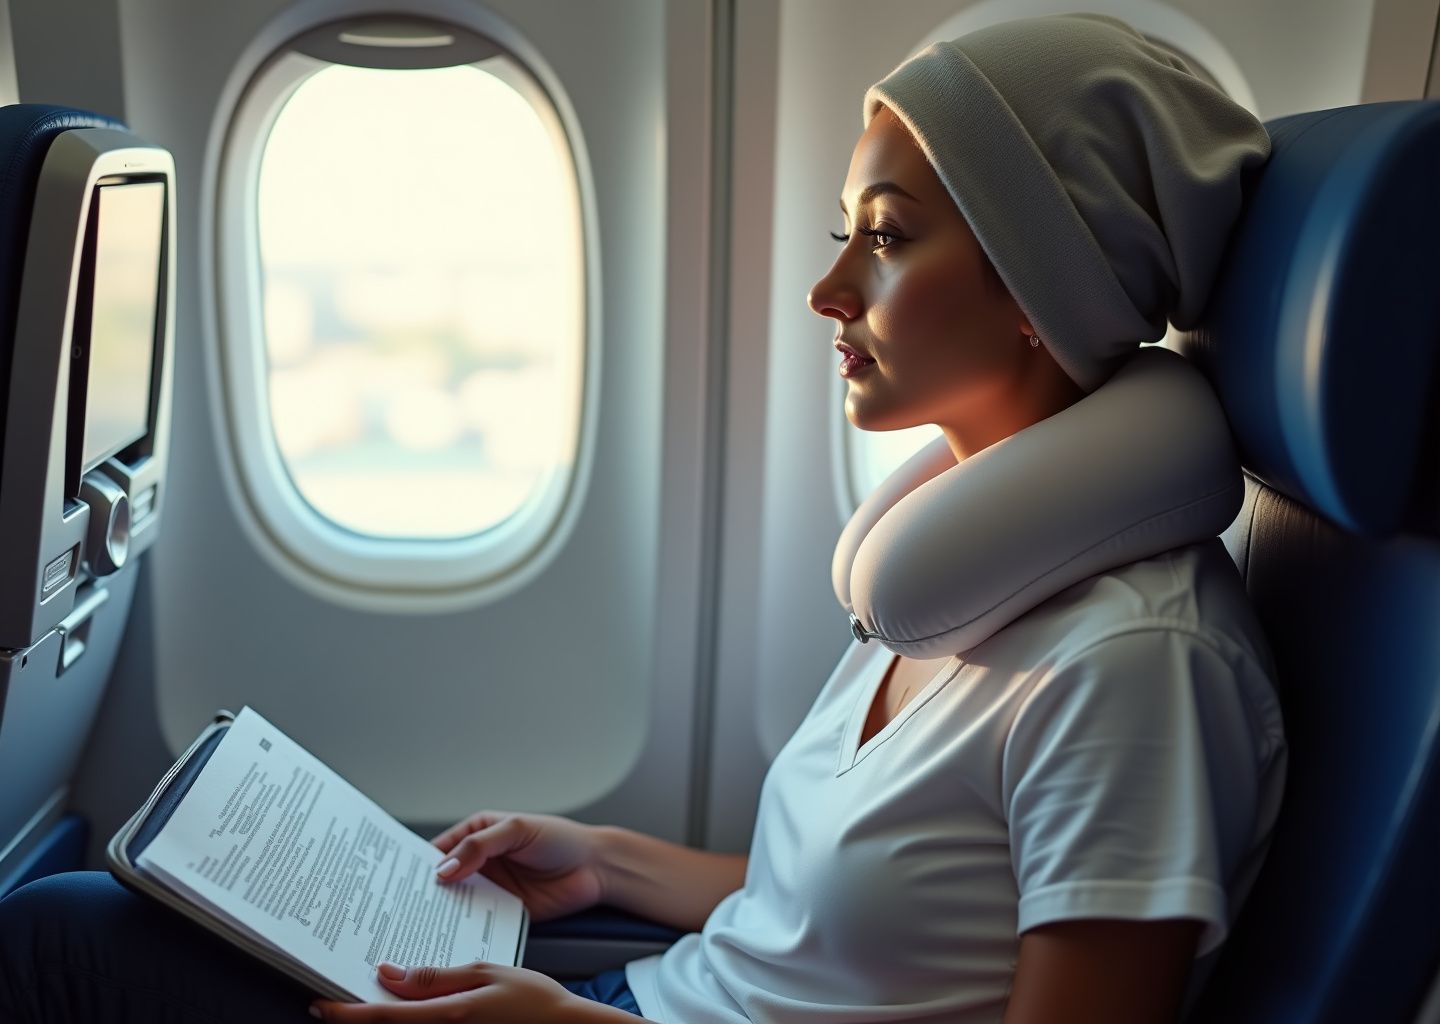
The standard airline pillow is not your friend. It’s designed to push your head forward and provides no real support. Your best tool is a U-shaped travel pillow, but you have to use it correctly. Don’t place it behind your neck like most people do. This will push your head forward and could press the donor area against the headrest. Instead, wear it backward, so the “U” cradles your chin. This supports your head and keeps it from falling to the side or forward, all while keeping the back of your scalp free from pressure. Some newer travel pillows are designed specifically for chin support, and these can be great options too.
Your seat choice can make a big difference. An aisle seat is often best because it gives you room to get up and move around, which is important for circulation on a long flight. It also prevents you from instinctively leaning your head against a window. If you do end up in a window seat, create a buffer. Use a clean, soft blanket or a folded jacket between your head and the wall, but be extremely conscious not to apply direct pressure to the grafted zones. Recline your seat just enough to be comfortable, but avoid a deep recline that encourages you to rest your head fully against the headrest. A slight recline combined with a properly used neck pillow is the safest way to rest on your journey home.
Best practices for wearing hats after a hair transplant
Wearing a hat after your hair transplant is a delicate balance. You want to protect your new grafts from the sun and keep your procedure private, especially while navigating airports. But the wrong hat, or wearing one too soon, can do more harm than good. Your new grafts are incredibly fragile, and their survival depends on avoiding three key threats during the initial healing phase: pressure, friction, and moisture.
Pressure from a tight hat band can restrict blood flow to the scalp, starving the new follicles of the oxygen and nutrients they need to anchor and grow. Friction, which happens when a hat rubs against your scalp as you move or adjust it, can physically dislodge or damage the grafts before they’ve fully secured themselves. Finally, moisture from sweat trapped under a non-breathable hat creates a warm, damp environment that can increase the risk of infection. Understanding how to manage these risks is essential for a successful outcome.
The timeline for safely wearing a hat is critical and depends on your surgeon’s specific instructions. However, general guidelines can help you plan your travel home.
- Days 0 to 3: No Hat Zone
During the first 72 hours, you should not wear any head covering other than the light, sterile surgical dressing or headband your clinic provides. The grafts are at their most vulnerable during this period. Your clinic will likely remove this initial dressing at your 24 or 48-hour follow-up appointment. After that, it’s best to leave your scalp exposed to the air as much as possible. - Days 4 to 10: The Ultra-Loose Phase
Once your surgeon gives you the green light, typically after the third or fourth day, you may be able to wear a very loose-fitting hat. Think of a soft, oversized bucket hat made of cotton or a disposable surgical cap. It should be so loose that it makes minimal to no contact with the recipient area. The goal is simply to provide a light shield from the elements, not to fit snugly on your head. - Days 10 to 14 and Beyond: Gradual Reintroduction
After about 10 days, the grafts are much more secure. You can start wearing slightly more structured but still loose-fitting hats, like a soft-brimmed cap. Avoid any hats with tight elastic bands or stiff materials that press on the scalp. Snug baseball caps, beanies, and especially hard hats or helmets are still off-limits for at least three to four weeks, and you should always get your surgeon’s approval before reintroducing them.
Your procedure type also influences your hat-wearing strategy. For FUE patients, the primary concern is the recipient area. The tiny donor-site punctures heal quickly and are less likely to be irritated by a hat. For FUT patients, however, you must also protect the linear donor scar. The band of a hat can rub directly on the suture or staple line, causing pain, irritation, and potentially affecting how the scar heals. A higher-sitting hat that doesn’t touch the donor area is preferable for FUT patients in the early weeks.
Choosing the right hat is just as important as timing. Look for hats made from soft, breathable materials like 100% cotton. Avoid wool or synthetic fabrics that can trap heat and moisture or cause irritation. The ideal travel hat is a lightweight, wide-brimmed bucket hat or a very loose-fitting cap. Before wearing any new hat, inspect the inside for rough seams or tags that could snag a graft and carefully cut them out.
How you put on and take off your hat is a skill in itself.
Putting a Hat On Safely
Hold the hat by the brim with both hands. Lower it over your head starting from the back, near your donor area, and gently bring it forward and down over the recipient area without sliding it across the scalp. The motion should be a simple “place,” not a “pull on.”
Taking a Hat Off Safely
Reverse the process. Gently lift the hat from the front brim, moving it up and away from your forehead first, then off the back of your head. This minimizes any chance of catching a graft on the way off.
For your flight home, preparation is key. Pack at least two or three clean, pre-inspected loose hats in your carry-on bag. This allows you to switch to a fresh one if the first gets dirty or feels uncomfortable. Also, pack a travel neck pillow. You can use it not just for sleeping, but to create a buffer between your head and the headrest during takeoff and landing, preventing direct pressure on your scalp. If swelling becomes an issue and your hat feels tight, take it off immediately. It’s better to feel exposed for a while than to risk constricting blood flow to your new grafts. If you have any doubts about a specific hat or are experiencing unusual discomfort, take a photo and send it to your surgeon before wearing it. Their guidance is always your best resource.
Sleeping upright on planes and minimizing swelling and risk
The journey home is often the final hurdle after a hair transplant abroad, and how you manage it can significantly impact your initial healing. While the previous chapter covered protecting your grafts with hats, navigating the flight itself, especially a long-haul one, requires a specific strategy for sleeping and managing swelling. The goal is to arrive home with your new grafts secure and your recovery on track.
Keeping your head elevated is the single most important action you can take to control post-operative swelling. Gravity is your best friend here. When your head is raised above your heart, it helps excess fluid drain away from your scalp and face, preventing the puffiness that often peaks two to four days after surgery. This principle is crucial on an airplane, where you’ll be seated for hours. Sleeping upright prevents fluid from pooling in the recipient area, which not only reduces discomfort but also minimizes pressure on the delicate, newly implanted follicles.
Successfully sleeping upright on a plane without compromising your grafts is a skill. It starts with smart planning.
Seat Selection Strategies
Your choice of seat can make a huge difference. An aisle seat is often the best option, as it allows you to get up and move around easily without disturbing other passengers. This is vital for promoting circulation and reducing the risk of deep vein thrombosis (DVT) on long flights. A bulkhead seat offers extra legroom, which can help you shift your position more comfortably. Avoid the window seat if possible; the temptation to lean your head against the cabin wall is strong, but the pressure and vibration can be disastrous for new grafts. In premium cabins, the increased recline and space make it easier to find a safe sleeping position, but the same principles of avoiding direct pressure apply.
Pillows and Head Support
A standard U-shaped travel pillow can be your worst enemy if used incorrectly. When placed behind your neck, it pushes your head forward and can create pressure on the donor area, especially after an FUT procedure. Instead, use the pillow in reverse, placing it under your chin. This supports your jaw and prevents your head from dropping forward or lolling to the side, all while keeping the back of your head free from contact with the headrest. Alternatively, you can use a small, soft travel cushion or even a rolled-up sweater placed on your shoulder to gently support the side of your head without applying direct pressure to the scalp. The key is to stabilize your head, not to lean it against something.
Safe Reclining
A slight recline can make sleeping more comfortable, but avoid reclining your seat fully. A deep recline increases the chance that your head will slide against the headrest, creating friction and shear forces that can dislodge grafts. A gentle tilt is enough to take pressure off your lower back without putting your scalp at risk.
The airplane cabin environment also plays a role in your recovery. While normal cabin pressure is not harmful to your grafts, the extremely low humidity (often below 20%) can lead to dehydration. Dehydration can worsen swelling and make you feel generally unwell. To counteract this, drink plenty of water throughout the flight. Avoid alcohol and caffeine, as they are diuretics and will dehydrate you further. It’s also wise to skip sedatives or strong sleeping pills; they can make you sleep too deeply, increasing the risk of accidentally leaning your head against a surface and reducing your natural impulse to move your legs, which is important for preventing blood clots.
For long-haul flights, take extra precautions against DVT.
- Wear compression stockings (15-30 mmHg) to support circulation in your legs.
- Get up and walk the aisle for a few minutes every hour.
- While seated, perform calf pumps and ankle circles every 30 minutes to keep blood flowing.
Your carry-on bag should be your mobile aftercare kit. Pack any prescribed medications, such as antibiotics or pain relievers, in their original containers. If you are on blood thinners for a pre-existing condition, you should have already discussed a management plan with your surgeon and primary care physician before your trip. Do not start taking anticoagulants without medical advice. If your surgeon recommended it, carry a small bottle of sterile saline spray. A gentle misting every couple of hours can keep your grafts hydrated in the dry cabin air.
If you notice a graft is bleeding, stay calm. Take a piece of sterile gauze from your post-op kit and apply firm, direct, and continuous pressure to the specific spot for a full 10 to 15 minutes. Do not lift the gauze to check during this time. This is usually enough to stop minor bleeding. If it persists or is heavy, discreetly notify a flight attendant for assistance.
While a medical certificate is generally not required by airlines for a hair transplant, policies can differ, and a visible head dressing might attract questions. To be safe, ask your clinic for a simple letter stating you have undergone a minor surgical procedure and are fit for air travel. Having this document in your carry-on can prevent potential delays with airline staff.
Finally, if you are traveling with a companion, explain your needs clearly. Ask them to help you remain upright and to be mindful of not accidentally bumping your head. If you are traveling with children, try to secure a seating arrangement that minimizes the chance of accidental contact. A well-planned flight is the final step in ensuring your journey to a fuller head of hair gets off to the best possible start.
Conclusions and safe return checklist
Your journey home is the final, critical step in securing the results of your overseas hair transplant. While the flight might seem daunting, a little preparation turns it into a manageable part of your recovery. Think of this as your final mission briefing, a summary of the most important rules and a practical checklist to ensure you, and your new grafts, arrive home safely and in the best possible condition. Protecting your investment now is what guarantees a great outcome months down the road.
Let’s recap the essentials for a smooth and safe return.
Key Rules for Your Flight Home
- When to Fly: The golden rule for FUE patients is to wait at least 48 to 72 hours after your procedure. This allows your clinic to perform a crucial 24 or 48-hour checkup, remove initial dressings, and give you the green light. For FUT (strip) surgery, the timeline is often longer; many surgeons recommend waiting 7 to 14 days until your sutures or staples are removed, especially if there’s any tension on the donor site. Never rush your departure against your surgeon’s advice.
- Wearing a Hat: Your first line of defense against bumps, sun, and unwanted glances at the airport is a hat, but timing is everything. You should only wear one after your clinic has removed the initial surgical dressing. For the first 7 to 10 days, stick to something extremely loose, soft, and breathable, like a cotton bucket hat or a disposable surgical cap. The hat should sit well above the grafts, creating a protective dome without touching them. Avoid structured baseball caps or tight beanies for at least two to four weeks, as their bands can apply direct pressure and dislodge fragile follicles.
- Sleeping Upright: This is non-negotiable for the first week to control swelling and protect your grafts. On the plane, this requires a specific technique. Use a U-shaped travel pillow, but wear it backwards, with the opening at the back of your neck and the cushion supporting your chin. This prevents your head from slumping forward or sideways, keeping the recipient area from making contact with any surface. Do not lean your head against the window or the headrest. If you must, place a clean, soft, folded blanket between your head and the surface, ensuring no direct pressure is applied to the grafts. An aisle or bulkhead seat can provide more room to adjust your position comfortably.
- Managing Swelling and DVT Risk: Swelling typically peaks around day three or four. Staying hydrated with water and keeping your head elevated are your best tools to manage it. For flights longer than four hours, deep vein thrombosis (DVT) is a real, albeit small, risk after any surgery. To combat this, wear compression stockings (15-30 mmHg), perform gentle calf exercises in your seat every 30 minutes, and get up to walk the aisle for a few minutes every hour. Avoid alcohol and sedatives, as they can increase dehydration and immobility.
Your Carry-On Safe Return Checklist
Pack these items in your carry-on bag, not your checked luggage. You’ll need them accessible throughout your journey.
- Prescription Medications: Any antibiotics, pain relievers, or other medications prescribed by your surgeon. Keep them in their original packaging. Pack a few extra doses in case of travel delays.
- Printed Post-Op Instructions: Don’t rely on your phone. A dead battery could leave you without crucial information. A printed copy of your aftercare steps and medication schedule is essential.
- Loose, Clean Hats: Pack at least two soft, breathable cotton hats. This way, you have a clean spare if one gets soiled.
- Travel Neck Pillow: A U-shaped pillow to be worn under your chin for upright sleeping support.
- Saline Spray: A small bottle of sterile saline spray (under 100ml/3.4oz) can help keep your grafts hydrated in the dry cabin air, but only use it if your surgeon has specifically recommended it for your aftercare routine.
- Compression Stockings: A must-have for any flight over four hours to promote circulation and reduce DVT risk.
- Surgeon’s Contact Information: Have your surgeon’s and clinic’s phone number, WhatsApp, and email address saved in your phone and written down on your printed instruction sheet.
- Baseline Photos: Clear, well-lit photos of your scalp taken immediately after surgery. These are invaluable for your surgeon to assess your progress or any concerns during a remote follow-up.
Action Plan for Complications After Landing
Once you’re home, continue to monitor your recovery. If you notice anything unusual, here’s how to respond.
- For Minor Concerns: If you experience mild itching, continued tightness, or have questions about scabbing, contact your surgeon. Send them the clear photos you took. Most issues can be easily managed through a telemedicine consultation.
- For Developing Problems: If you notice persistent oozing, increasing redness that spreads, localized warmth, or any pus-like discharge, contact your operating surgeon immediately. They need to be your first call. If they are unreachable or advise you to seek local care, go to an urgent care center. Be prepared to show them your post-op instructions and your surgeon’s contact information.
- For Emergencies: Seek immediate medical attention at the nearest emergency room for any of the following symptoms: bleeding that won’t stop with 15 minutes of direct pressure; a fever over 100.4°F (38°C); severe or uncontrollable pain; sudden and excessive swelling; or any signs of an allergic reaction or DVT (such as shortness of breath or a swollen, painful calf). Inform the ER staff about your recent surgery abroad and contact your surgeon as soon as you are able.
Remember, your overseas clinic wants you to have a successful outcome. Stay in close communication with them about your travel plans before you even book your flight. They can provide personalized advice and are prepared to support you remotely with telemedicine follow-ups, ensuring your recovery continues smoothly long after you’ve landed.
Sources
- Hair Transplant Statistics and Facts – Market.us Media — Specifically, 45.81% of respondents indicated that they were open to traveling internationally for the procedure. This suggests that a substantial number of …
- Hair Restoration Trends & Data: Ultimate Statistics Report — The global market for hair restoration is valued at roughly USD 6.91 to USD 7.52 billion, marking a significant increase from previous …
- Why Thousands of Americans Are Flying to Turkey for Hair … — Turkey’s exploding as the hotspot for hair transplants, pulling in over a million international patients with costs 70–80% below US …
- Hair Transplant Results by Country: Your Global Guide — Searching for the best hair transplant results? Compares success rates, costs, and quality across leading countries.
- The Best Countries for Hair Transplants: Costs, Risks & Safety … — In this guide, we’ll explore some of the top destinations for hair transplants abroad and address common questions about the safety and risks of medical …
- Why More Americans Choose Turkey for Hair Transplants — Data collected about Turkey hair transplants indicates that many medical tourists stay longer than a week to relax, sightsee, and make sure they …
- Hair Transplant Cost: Turkey vs. Mexico | A Comparison — Curious about hair transplant costs? Compare Turkey vs. Mexico prices, techniques, and quality. Top-notch results for affordable prices.
- Best hair transplantation destinations in the world – UAmedTOURS — According to the International Society of Hair Restoration Surgery (ISHRS), about 15% of patients, regardless of gender, visit foreign clinics …
- Best Hair Transplant Prices in Turkey – Cost & Packages — Turkey hair transplant prices with USD/EUR/GBP bands, 1.500 – 5.000 graft table, package add-ons, and FX tips – plus what top clinics …
Legal Disclaimers & Brand Notices
The content of this article is provided for informational purposes only and is intended to offer general guidance regarding post-operative care and travel following hair transplant procedures (FUE and FUT). This information is not a substitute for professional medical advice, diagnosis, or treatment from a qualified healthcare provider.
Always seek the advice of your surgeon or another qualified medical professional with any questions you may have regarding a medical condition, procedure, or recovery plan. Never disregard professional medical advice or delay seeking it because of something you have read in this article. Specific timelines, aftercare instructions, and risk management protocols must be followed exactly as provided by the surgical team that performed your procedure.
All product names, logos, and brands mentioned or implied in the context of medical devices or pharmaceuticals (e.g., specific saline sprays, compression stockings, or medications) are the property of their respective owners. The discussion of these items is purely for informational purposes regarding general aftercare practices.