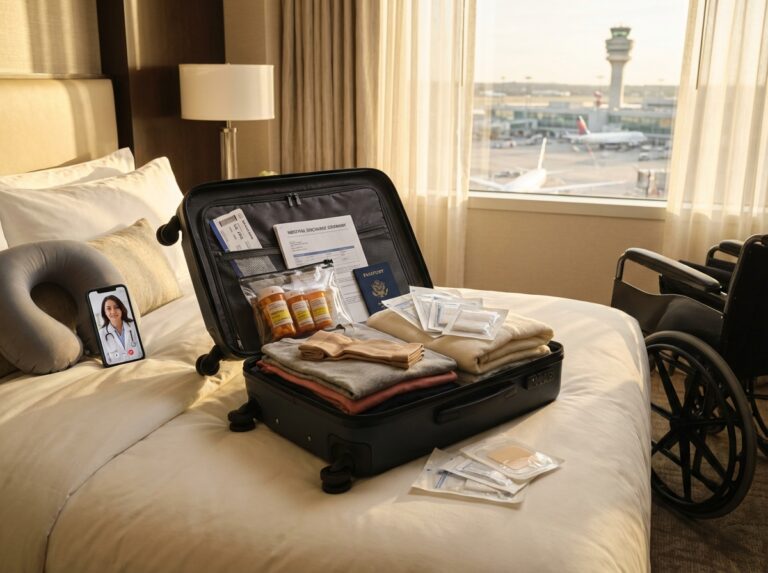
Traveling abroad for surgery demands careful preplanning and a packing strategy that supports safe recovery, follow-up, and travel home. This article provides an ultimate packing list and practical guidance on documentation, medications, wound care supplies, mobility aids, travel logistics, and contingency planning. Use these checklists and expert tips to reduce complications, comply with regulations, and return home comfortably after treatment overseas.
Planning documentation and essential paperwork
Managing paperwork is the most critical part of preparing for surgery in another country. It serves as your safety net if complications arise or if you need to explain your situation to a doctor back home. You should treat your medical documentation with the same level of care as your passport. In 2025, nearly two million Americans are expected to travel abroad for medical care. This high volume of patients means that border agents and medical staff are familiar with these documents, but they expect them to be organized and professional.
The Essential Documentation Checklist
You need a prioritized list of documents that stay with you at all times. Start with clear copies of your passport and any necessary travel visas. Your travel insurance policy is next. It must specifically include medical evacuation coverage. Keep the policy numbers and the 24-hour emergency hotline number highlighted. You also need the full contact information for your surgeon. This includes the clinic name, physical address, direct phone numbers, and an emergency email address. Having the name and address of the hospital where the procedure occurs is vital for local transportation and emergency services.
Clinical Records and Instructions
Before you leave the facility, gather every piece of paper related to your treatment. This includes detailed preoperative and postoperative instructions provided by your surgeon. You must have the operative report and any pathology results if they apply to your case. A discharge summary is mandatory. It should outline the procedure date, the diagnosis, any complications, and the specific steps taken during surgery. Ensure you have a comprehensive medication list. This list must use generic drug names and include exact dosages. Brand names vary by country, so generic names are the only way to ensure safety. If the host country requires specific vaccinations, keep those records in this set as well. Finally, include a written follow-up plan with specific dates for suture removal or check-ups.
Creating a Digital Safety Net
Paper can get lost or damaged by liquids. You need digital backups of every single document. Scan everything into high-quality PDFs. Sync these files to a secure cloud service like Google Drive or iCloud before you head to the airport. You should also carry an encrypted USB drive in your luggage. A 64GB drive is plenty of space for years of medical history. Use password protection on the drive to keep your data safe if it falls into the wrong hands. Test your ability to access these files from a mobile device while you are still in the United States.
Sharing Records with Your US Doctor
It is a mistake to wait until you return home to update your local physician. Securely share your foreign medical records with a trusted US-based clinician before you even board your flight back. Most modern practices use secure portals like MyChart for this purpose. Avoid sending sensitive health information through standard, unencrypted email. Using a HIPAA-compliant platform ensures your privacy remains intact. This step allows your local doctor to review the surgeon’s work and prepare for your first follow-up appointment in the States.
Handling Translations and Signatures
If your surgery takes place in a country where English is not the primary language, you might receive documents in the local tongue. You must obtain certified translations for these records. A standard translation is not enough for medical or legal purposes. Look for translators certified by the American Translators Association. These professionals provide a signed statement of accuracy. While digital copies are often acceptable for operative reports, some documents require original signatures. Your passport, visa, and insurance policy should always be the original versions. Your surgeon’s fit-to-fly clearance should also have an original ink signature to avoid issues with airline personnel.
| Document Type | Format Required | Storage Location |
|---|---|---|
| Passport and Visas | Original and Copy | Carry-on Folder |
| Insurance Policy | Original and Digital | Medical Travel Folder |
| Discharge Summary | Copy and Digital | Medical Travel Folder |
| Medication List | Original and Digital | Carry-on Folder |
| Operative Report | Copy and Digital | Medical Travel Folder |
The Two-Folder Organization System
Organization prevents panic at the airport or in the hospital. Use a waterproof binder as your main medical travel folder. Use dividers to separate sections like “Insurance,” “Surgical Reports,” and “Contacts.” This binder stays in your main carry-on bag. Create a second, smaller folder or a clear plastic sleeve for immediate access. This smaller folder should hold your passport copies, the medication list, and your insurance card. This is what you show to TSA or airport security if they ask about your medical supplies. Keep your original documents separate from your copies. If your main bag is stolen, you should still have digital access and paper copies tucked away in a different piece of luggage.
Privacy and Security Warnings
Data privacy is a major concern when traveling for healthcare. The industry is growing rapidly, which also attracts digital threats. Never leave your medical folder unattended in a hotel room. Use the hotel safe for your original passport and extra copies of your records. When sharing files electronically, always use encrypted links. Be cautious about using public Wi-Fi at airports or cafes to access your medical cloud storage. A VPN is a helpful tool to add a layer of security to your digital footprint while you are abroad.
Medications prescriptions and legal compliance
Managing your medications is a vital part of surgery prep. You cannot just throw a few pills in a bag and hope for the best. Crossing borders with prescriptions requires careful planning. You need to follow U.S. laws and the rules of your host country. This ensures you stay healthy and avoid trouble at customs.
Your Daily Prescription Supply
The Fourteen Day Rule
Pack all your regular daily medications in your carry-on. Bring enough for the entire trip. You must add at least fourteen extra days of supply to this amount. Travel delays happen frequently in 2025. A flight cancellation or a longer hospital stay can leave you stranded. Having a two-week cushion prevents a medical emergency if you cannot get home on time.
Original Containers Only
Keep every medication in its original pharmacy bottle. The label must show your name and the name of the drug. It should also show the dosage and the prescribing doctor. Customs officers often suspect loose pills in plastic bags. Using original containers proves the medicine belongs to you. If you use a pill organizer, pack it empty. You can fill it once you arrive at your destination.
Post-Operative Medication Essentials
Pain Management and Antibiotics
Your surgeon will prescribe specific drugs for your recovery. You will likely need antibiotics like cephalexin to prevent infection. Pain relief is also a priority. Many patients receive opioids like oxycodone for the first few days. You should also pack anti-nausea medication like ondansetron. Surgery and anesthesia often cause an upset stomach. Stool softeners are another essential item. Pain meds and immobility frequently lead to constipation. Ask your surgeon for these prescriptions well before your departure date.
Anticoagulants and Topicals
Blood clots are a serious risk after surgery and long flights. Your doctor might prescribe anticoagulants or blood thinners. These are critical for your safety. You may also need topical agents like antibiotic ointments or specialized creams. Ensure these are included in your physician letter so you can carry them through security without issues.
Legal Documentation for Customs
The Physician Letter
You need a formal letter from your doctor. This document should be on official letterhead and signed by the physician. It must list every medication you are carrying. Use generic drug names instead of brand names. This helps international doctors and pharmacists identify the medicine. The letter should state the medical necessity for each drug. It must also include clear dosing instructions. Keep a printed copy in your carry-on and a digital version on your phone.
Controlled Substances and DEA Rules
Bringing narcotics or other controlled substances across borders is complicated. U.S. Customs and Border Protection rules are very strict. You are generally allowed to bring up to fifty dosage units of a controlled substance into the USA. If your prescription exceeds this amount, you may need to file DEA Form 236. You should check the CDC Yellow Book for specific health and travel guidance. Always verify the laws of your host country. Some nations have zero-tolerance policies for certain medications that are legal in the United States. Consult both your U.S. doctor and your foreign surgeon about these regulations.
International Pharmacy and Refills
Finding Emergency Supplies
If you lose your medication, you need a backup plan. The U.S. Embassy in your host country can provide a list of English-speaking pharmacies. Large international hospitals often have well-stocked pharmacies. For example, Bumrungrad Pharmacy in Bangkok is known for carrying many American brands. You will need your physician letter and a copy of your original prescription to get a refill. Be aware that some drugs have different names in other countries. This is why generic names are so important. Use the Google Translate app to communicate with local pharmacists; it has an offline mode for areas with poor cell service.
Transporting Refrigerated Medications
Cooling Solutions and Tech
Some medications must stay at a specific temperature. You should use a battery-powered travel cooler or a specialized cooling wallet. Frio wallets are a popular choice because they use evaporation to stay cold for up to forty-five hours. You can also find USB-powered coolers that plug into a portable power bank. Always declare these items to the airline before you board. They are considered medical equipment and usually do not count toward your carry-on limit. Bring documentation that explains why the medicine must remain cold.
Medication Planning Table
| Medication Type | Recommended Quantity | Documentation Needed |
|---|---|---|
| Daily Prescriptions | Trip duration plus 14 days | Original pharmacy labels |
| Antibiotics | Full 10 to 14 day course | Physician letter |
| Pain Medication | 5 to 7 day supply | DEA Form 236 if >50 units |
| Anticoagulants | As prescribed for travel | Medical necessity letter |
| Refrigerated Meds | Full trip supply | Cooler tech specs |
Final Organization Tips
Create a printed medication schedule for yourself and your caregiver. List the time of day and the dosage for every pill. This prevents mistakes when you are tired or groggy from surgery. Share a digital copy of this schedule with a family member back home. If you have any allergies, include them at the top of this list. This simple step can save your life in an emergency.
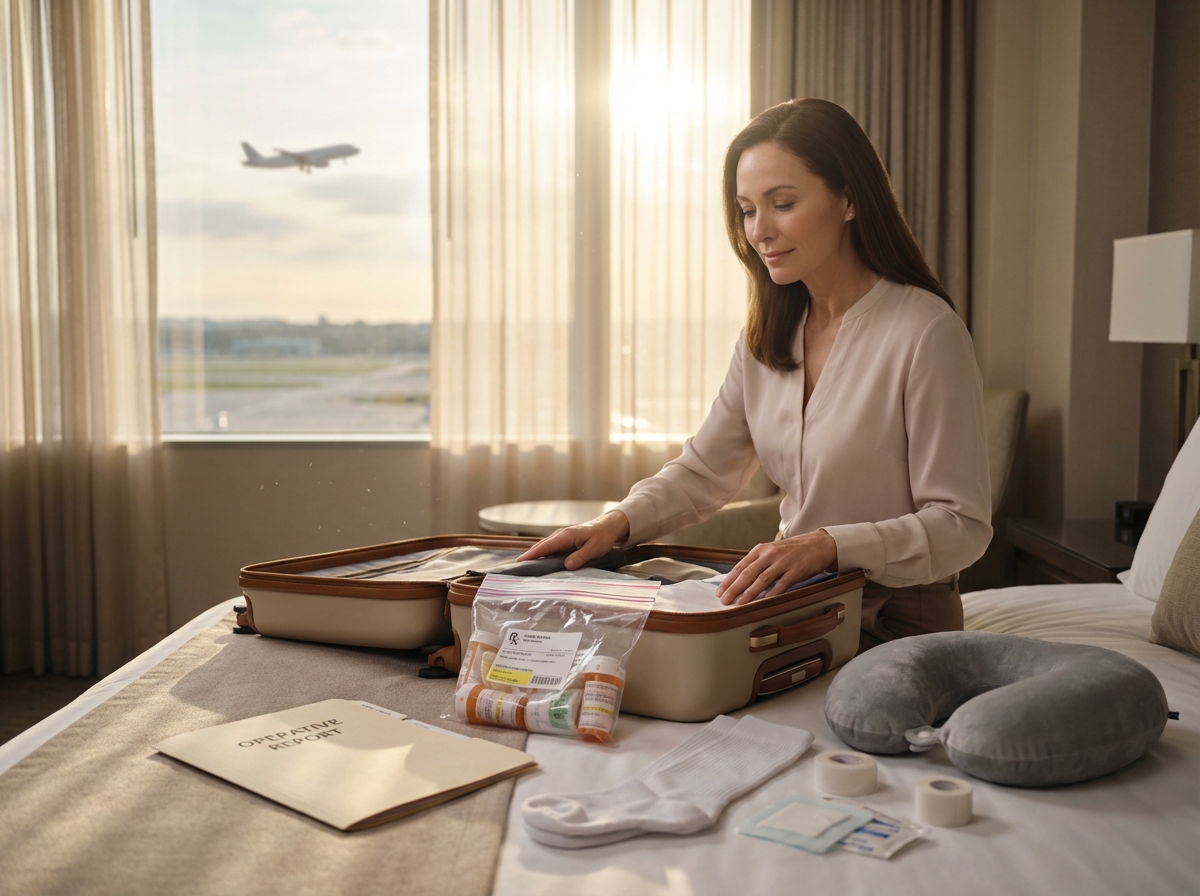
Wound care dressing and medical supplies checklist
Packing for a surgical journey requires more than just clothes and a passport. You need a dedicated medical kit to manage your recovery before you even board the plane back to the United States. Many patients assume the hospital abroad will provide everything. While top tier facilities in places like Mexico or Thailand offer excellent care, they often provide only enough supplies for your stay in their wards. Once you move to a recovery hotel or start your journey home, you are responsible for your own wound care. Having a granular, item by item kit ensures you never have to scramble for sterile supplies in a foreign pharmacy where language barriers might complicate things.
The Core Wound Care Checklist
Your kit should cover at least fourteen days of daily dressing changes. This timeline accounts for the initial healing phase and any travel delays. Start with sterile gauze pads. Pack at least fifty individual 4×4 inch pads. These are used for cleaning and covering incisions. You will also need non adherent dressings like Adaptic or Telfa. These are vital because they do not stick to the wound. Pack twenty pieces. For larger incisions, include ten to fifteen abdominal pads. These provide extra absorption and cushioning. Secure these with two rolls of paper tape for sensitive skin and two rolls of waterproof tape for areas that might get damp. Transparent film dressings like Tegaderm are excellent for keeping wounds dry during quick sponge baths. Pack ten of these in various sizes.
Cleaning and Antiseptics
Sterile environment maintenance is non negotiable. Pack a box of one hundred alcohol prep pads for cleaning skin around the wound. Do not use them directly on the incision. For the wound itself, bring twenty saline flushes or a bottle of sterile wound wash. These allow you to rinse the area without touching it. Include a pack of antiseptic wipes and four small tubes of antibiotic ointment like Neosporin. Only use ointment if your surgeon specifically instructs you to do so. Some modern surgical techniques prefer dry healing. You should also pack ten pairs of sterile gloves. Using gloves prevents the transfer of bacteria from your hands to the surgical site. Include a small pair of medical scissors to cut tape or bandages. Ensure these are in your checked luggage to avoid issues with airport security.
Specialized Supplies for Specific Procedures
Different surgeries require unique tools. If you are undergoing a tummy tuck or a mastectomy, you might have surgical drains. Pack extra supplies for Jackson Pratt bulbs. This includes small measuring cups to track fluid output. If your surgery involves an ostomy, bring a three week supply of pouches and skin barriers. For those having orthopedic or cosmetic procedures, compression is key. Pack at least two sets of medical grade compression garments. These help reduce swelling and prevent fluid buildup. If your surgeon mentions suture removal before you leave, you might need a sterile suture removal kit. This usually contains specialized scissors and forceps. Only pack this if you are instructed to use it. Most surgeons prefer to handle this themselves or have a local nurse do it.
Quantities and Storage
The amount of supplies depends on your procedure and expected healing time. A laparoscopy might only need a week of light dressings. A major open surgery requires at least four weeks of supplies. A safe rule is to pack for two weeks of daily changes. Store your supplies in clear Ziploc bags. Label each bag by category like Cleaning, Dressings, or Specialized Gear. This makes it easy for you or a caregiver to find what is needed quickly. Keep these bags in your carry on luggage if possible. If your checked bag goes missing, you cannot afford to be without sterile dressings. Check all expiration dates before you pack. Sterile items lose their effectiveness if the packaging is old or compromised.
Managing Care with a Schedule
Recovery can be a blur of medication and sleep. Create a simple wound care chart for your caregiver. Use a table to track the date and time of each dressing change. Include a column for the amount of drainage and the color of the fluid. Note any signs of redness or increased heat around the incision. This log is an invaluable tool if you need to call your surgeon or visit a local clinic. It provides a clear history of your healing progress. You can find more information on managing health abroad through the CDC Yellow Book which details risks and preparations for medical travelers.
| Supply Item | Recommended Quantity | Purpose |
|---|---|---|
| Sterile Gauze 4×4 | 50 pads | General cleaning and covering |
| Non Adherent Pads | 20 units | Direct wound contact |
| Saline Flushes 10ml | 20 units | Irrigating the incision |
| Alcohol Prep Pads | 100 count | Cleaning surrounding skin |
| Silicone Scar Sheets | 10 sheets | Long term scar management |
| Disposable Underpads | 10 pads | Protecting bed linens |
Sourcing Supplies Locally
If you run out of items, you must find high quality replacements. Look for JCI accredited hospitals or major pharmacy chains in the host country. Verify that the supplies are sterile and the packaging is intact. Look for recognized international brands like 3M or Johnson and Johnson. Avoid buying medical supplies from small street markets or unverified vendors. The risk of contamination is too high. If you are in Mexico or Thailand, many large pharmacies stock the same brands you find in the United States. Always check the sterile status on the label before purchasing.
Waste Disposal and Sharps
Medical waste requires careful handling. Use small biohazard bags or sturdy plastic bags to seal used dressings before putting them in the trash. If your recovery involves needles, you must use a sharps container. TSA allows a 1.4 quart FDA approved sharps container in carry on luggage. Never put loose needles in your bags or hotel trash cans. Check the customs policies of your host country regarding the transport of used medical supplies. Most countries allow you to carry a personal sharps container as long as it is properly sealed. When you return to the USA, declare any medical waste or sharps to customs if asked. Proper disposal protects you and the people handling your luggage.
Comfort mobility and recovery aids to make travel easier
Once you have organized your bandages and sterile supplies, you must turn your attention to the physical realities of moving your body. Traveling back to the United States after a procedure requires more than just medical clearance. It requires a strategy for comfort and safety. Many of the nearly 1.9 million Americans who travel abroad for surgery each year find that the flight home is the most taxing part of the journey. You need tools that support your circulation and protect your surgical site while you navigate airports and long hours in a cramped cabin.
Compression and Circulation Management
Preventing deep vein thrombosis is a primary concern when flying after surgery. You should pack high quality compression socks that provide graduated pressure. For most patients, a compression level of 15 to 20 mmHg is sufficient for low risk situations. If you have undergone orthopedic surgery or have a higher risk of clots, your surgeon might recommend 20 to 30 mmHg or even 30 to 40 mmHg. Brands like Sigvaris are often recommended for their durability. You should put these on before you reach the airport and keep them on until you are safely home. To further reduce risk, plan to walk for five minutes every two hours during your flight. If you are stuck in your seat, perform fifteen ankle circles every hour to keep blood moving in your lower legs.
Clothing and Footwear for Recovery
Your choice of clothing can significantly impact your comfort during dressing changes and security screenings. Pack loose garments that do not press against your incisions. Front zip tops are better than pullovers because they allow easy access for doctors or nurses without requiring you to lift your arms. Drawstring pants or soft leggings are preferable to jeans. For footwear, choose slip on shoes with non slip soles. Crocs or similar styles are useful because they accommodate post surgical swelling and do not require you to bend over to tie laces. This is especially important for patients returning from hip or abdominal procedures where bending is restricted.
Mobility Aids and Airport Logistics
Do not assume you will be able to walk long distances through international terminals. Even if you feel strong in the hospital, the fatigue of travel is different. You should arrange for wheelchair assistance at least 72 hours before your flight. You can do this through your airline app or by calling their customer service line. This service is usually free and ensures you are transported from the check in desk to the gate and from the plane to customs upon your return. If your procedure requires a cane or walker, choose a folding model. An adjustable aluminum cane that fits a height of 36 to 39 inches is standard for most adults. Folding walkers should be airline compliant, typically measuring around 26 by 7 by 30 inches when collapsed. These can often be gate checked just like a stroller. Additionally, if you have metal implants like a hip replacement, inform the TSA officer immediately. You can show them a medical notification card to speed up the process, though they may still use a wand or pat-down.
Personal Care and Hygiene Tools
Recovery in a hotel or a foreign rental space can be difficult if the bathroom is not equipped for patients. Consider packing or locally purchasing a few adaptable items. A long handled sponge allows you to wash without straining your incisions. If your surgeon allows showering, a handheld showerhead attachment can be a lifesaver. You might also need to coordinate with your medical provider to ensure your accommodation has a shower seat. These small adjustments prevent falls and reduce the physical stress of basic hygiene. If you are traveling alone, these tools become even more vital for maintaining your independence during the first few days of healing.
| Item Category | Specific Recommendation | Purpose |
|---|---|---|
| Circulation | 15 to 30 mmHg Compression Socks | Reduces DVT risk by 50 percent |
| Mobility | Folding Cane or Walker | Provides stability during transfers |
| Sleep | Memory Foam Neck Pillow | Maintains spinal alignment in flight |
| Footwear | Non slip Slip on Shoes | Accommodates swelling and prevents falls |
| Hygiene | Long handled Sponge | Assists with washing without bending |
Flight Comfort and Sleep Support
The environment of an airplane cabin is not designed for healing. You must bring your own support system. A memory foam travel pillow, such as the Cabeau Evolution S3, provides neck support and prevents your head from dropping forward if you fall asleep. If you had back or abdominal surgery, a small lumbar pillow or a rolled up blanket in your carry on can help maintain a neutral spine position. Noise cancelling headphones are not just for entertainment. They reduce the ambient stress of the cabin and help you rest. Pack an eye mask and earplugs to block out light and sound during long haul flights. Sleep is a critical component of the healing process and these items help you achieve it in a loud environment.
Small Comforts and Hydration
Dehydration increases the risk of complications after surgery. Aim to drink about eight ounces of water for every hour you are in the air. Bring a reusable hydration bottle that you can fill after passing through security. Avoid alcohol and caffeine as they can interfere with your medications and dehydrate your tissues. Pack small snacks that meet your dietary restrictions, such as plain crackers or protein bars. Sugar free gum is another essential item. Chewing it during takeoff and landing helps equalize ear pressure, which can be more painful if you are already dealing with systemic inflammation. If you have a long layover, choose a seating area near the gate that allows you to stretch your legs frequently. Avoid layovers shorter than three hours for international travel to ensure you have enough time to move between gates without rushing.
Estimating Your Needs
The amount of gear you bring depends on your specific surgery. A patient returning from a minor laparoscopic procedure might only need compression socks and a neck pillow. Someone recovering from a major orthopedic surgery will need a full suite of mobility aids and possibly a travel wheelchair. Always consult your surgeon about the expected level of mobility you will have on the day of your flight. They can provide a fit to fly letter that details your needs for the airline staff. This letter should be kept in your carry on folder for quick access during boarding or at customs. Planning for the worst case scenario regarding your mobility ensures that you are never stranded or in pain during your journey home.
Travel logistics and timing your return flight
Planning the trip home is the most critical part of your surgical journey. You cannot simply book a flight for the day after your discharge. Your body needs time to stabilize before it can handle the pressure changes and physical demands of air travel. The operating surgeon must provide a formal medical clearance before you head to the airport. It is wise to involve a clinician in the United States to review your progress. This creates a bridge of care that ensures your transition home is handled with professional oversight.
Flying after a major procedure introduces several physical risks. Deep vein thrombosis is a primary concern because long periods of sitting can cause blood clots. Low cabin humidity and pressure changes can also lead to dehydration or respiratory issues. There is a risk of wound dehiscence where surgical incisions pull apart due to the strain of movement. Your mobility might be limited, making it hard to navigate terminals or use small airplane restrooms. Some patients may even require supplemental oxygen or professional nursing care during the flight.
Timing your return depends entirely on the complexity of your treatment. While your surgeon has the final word, general safety windows provide a starting point for your planning.
| Surgery Type | General Wait Time Before Flying |
|---|---|
| Minor Laparoscopic Procedures | 3 to 5 days |
| Cosmetic Face or Neck Work | 5 to 7 days |
| Moderate Orthopedic Surgery | 7 to 10 days |
| Major Abdominal Surgery | 10 to 14 days |
| Thoracic or Chest Surgery | 4 to 6 weeks |
You must obtain a fit to fly form from your treating physician. This document is a standard medical clearance that airlines often require for passengers who recently had surgery. The form usually includes your blood pressure, oxygen saturation levels, and a statement on your mobility status. It should also list any specific needs like wheelchair assistance or the ability to keep your legs elevated. Keep the original signed copy in your carry on bag.
Seat selection is a strategic decision for your recovery. An aisle seat is essential because it allows you to stand up and move without disturbing others. Bulkhead seats are even better because they offer extra legroom. This space is vital if you need to perform calf exercises or if you have a caregiver who needs to sit nearby. For very complex recoveries, you might need to reserve a medical seat or a stretcher. These options often require booking an entire row and must be coordinated with the airline weeks in advance.
Preventing blood clots is a top priority during the flight. You should wear compression stockings with a pressure rating of 15 to 20 mmHg. These garments help maintain blood flow in your lower legs. Make a plan to walk for five minutes every hour that you are awake. While seated, perform ankle circles and calf pumps at least ten times every hour. Hydration is equally important. Drink 8 ounces of water for every hour you are in the air. Avoid caffeine or alcohol as they contribute to dehydration. If your doctor prescribes anticoagulants or a low dose aspirin, follow the schedule exactly. Additionally, keep a small supply of sterile gauze and medical tape in your carry-on bag. If a dressing fails midflight, go to the lavatory to clean the area, apply a fresh pad, and secure it with paper tape.
If you are traveling alone or have high care needs, consider hiring a medical escort. These professionals are often registered nurses who travel with you to monitor your vitals and manage medications. If you require oxygen, you must use an FAA approved portable oxygen concentrator. You will need to rent this equipment and get airline approval at least 48 to 96 hours before departure.
Communication with the airline staff makes the process smoother. Request wheelchair assistance at least 72 hours before your flight. When you arrive at the gate, inform the crew about your recent surgery. They can help with pre boarding so you can get settled without the rush of the crowd. During the flight, the cabin crew can provide extra water or help you reach the lavatory if you feel unsteady.
Logistics on the ground should be as simple as possible. Coordinate transport that takes you directly from the airport to your home with minimal transfers. When booking your flight, avoid tight layovers. A connection of at least 3 or 4 hours is safer. This gives you time to move slowly between gates and accounts for any delays.
Many patients find that the return trip is the most taxing part. If your condition changes before you leave for the airport, do not board the plane. A sudden fever, increased pain, or new swelling are signs that you need to stay put. Contact your surgeon immediately to reassess your fitness for travel. It is better to pay for a hotel extension than to face a medical emergency at 30,000 feet.
Contingency planning complications and emergency contacts
Preparing for Complications and Unexpected Events
Planning for the worst while hoping for the best is the only way to approach surgery in a foreign country. Complications do not always happen in the operating room. They often surface days later when you are in a hotel or on a plane. You must have a prioritized action plan ready before you even leave the United States. This plan should focus on immediate recognition of red flags and a clear chain of command for communication.
Recognizing Early Warning Signs
You need to monitor your body every hour during the first week of recovery. A fever higher than 101 degrees Fahrenheit is a primary indicator of infection. Do not ignore uncontrolled pain that persists even after taking your prescribed doses. Watch for heavy bleeding or drainage that exceeds 50ml within a twenty four hour period. Shortness of breath or sudden chest pain can signal a pulmonary embolism which requires immediate intervention. Look for signs of infection such as spreading redness or foul smelling discharge from the incision site. Swelling in only one leg is another major red flag for a blood clot. If any of these symptoms appear you must act within minutes rather than hours.
Immediate Action Steps
Your first call must always be to the local surgeon who performed the procedure. They understand the specific nuances of your surgery and the local hospital protocols. If you cannot reach the surgeon within thirty minutes you should contact the hospital emergency department directly. Keep your US based clinician informed of any changes in your status. If the situation is life threatening you should bypass the surgeon and call local emergency services immediately. In many countries the emergency number is 112 or a local equivalent like 911 in Mexico. Having these numbers pre programmed into your phone is essential for a fast response.
Emergency Documentation and Communication
Communication barriers can turn a minor complication into a crisis. You should carry a laminated emergency card at all times. This card needs to be printed in both English and the language of your host country. It should list your full name and your specific surgical diagnosis. Include a complete list of medications with generic names and exact dosages. List all known allergies with their corresponding ICD 10 codes for medical precision. The card must feature the contact details for your foreign surgeon and the treating hospital. Include your medical evacuation insurance policy number and their twenty four hour international hotline.
Coordinating with the Embassy
The United States embassy or consulate can be a vital resource during a medical crisis. While they do not pay for medical bills they provide lists of vetted English speaking doctors and JCI accredited hospitals. They can help notify your family in the US if you are unable to do so. In extreme cases they assist with the logistics of returning home. Keep the phone number for the nearest consulate saved in your contacts. For example the US Embassy in Mexico City or the embassy in Bangkok can provide guidance on local legal requirements for hospital admissions.
Preserving Evidence for Follow Up Care
If a complication occurs you must document everything to ensure your doctors at home can provide the best care. Take daily high resolution photographs of your wounds with a date and time stamp. Save these images to a secure cloud service like Google Drive or iCloud. Request copies of all new imaging such as ultrasounds or CT scans on a USB drive before leaving the foreign facility. Keep a daily log of your vitals including temperature and drainage amounts. This documentation streamlines the handoff to your US healthcare provider and protects you if there are disputes regarding your care.
Medical Evacuation Insurance and Repatriation
Standard travel insurance is rarely enough for surgical patients. You need a dedicated medical evacuation policy that specifically covers complications from elective surgery. These policies can cost between 150 and 300 dollars but they cover expenses that can reach 100,000 dollars. Confirm that your policy includes repatriation which is the process of flying you back to a hospital near your home in the USA. Check if the coverage includes transport for a caregiver or family member. You must understand the activation procedure before you travel. Most companies require you to call their hotline before any transport is arranged. They will coordinate with your local doctor to determine if you are stable enough for a medical flight.
| Complication Sign | Threshold for Action | Immediate Contact |
|---|---|---|
| Fever | Above 100.4 F | Local Surgeon |
| Bleeding | Saturating a bandage in 1 hour | Emergency Room |
| Shortness of Breath | Any sudden onset | Local Emergency Services |
| Leg Swelling | Unilateral with pain | Local Surgeon |
Navigating Local Services and Follow Up
When you arrive at a local emergency room abroad you will need your passport and your original discharge summary. Many foreign hospitals require a deposit or proof of insurance before admission. Having a digital backup of your records on an encrypted USB drive is a smart precaution. Once you are stabilized you should schedule a telemedicine visit with your foreign provider. Research shows that 85 percent of postoperative issues can be managed through remote consultation. This allows the surgeon who knows your case to guide the local team. Ensure your US based primary care doctor is ready to receive your records through a secure portal like MyChart within 72 hours of your return home.
Checklist for Immediate Steps
Gather your passport and insurance card. Call the surgeon 24/7 emergency line. Take a photo of the complication site. Alert your emergency contact in the USA. Prepare your medical travel folder for the hospital. Contact your medical evacuation provider to open a case. These steps ensure that you remain in control of your recovery even when the unexpected happens.
Final takeaways and next steps
Getting everything ready for a surgery trip involves many moving parts. It is easy to feel overwhelmed by the sheer volume of paperwork and supplies. By now, you have a good idea of what to pack and how to handle the flight home. The goal is to move from the planning phase into the action phase with a clear set of priorities. This final stage is about organization. It ensures that when you are in a recovery bed in a different time zone, you are not scrambling for a phone number or a specific medical record.
Immediate actions to take now
These are the tasks you should complete as soon as you commit to your surgery date. Waiting until the week of departure creates unnecessary stress.
Gather your travel documents
Make sure your passport is valid for at least six months beyond your return date. Scan your passport and your surgical contract. Store these in a secure cloud folder. Print two physical copies. Keep one in your carry on bag. Leave the other with a trusted person at home.
Confirm your insurance coverage
Standard travel insurance often excludes complications from elective surgery. You need a policy that specifically covers medical tourism. Verify that it includes medical evacuation. This can cost between 150 and 300 dollars but saves you thousands if you need a specialized flight back to the USA.
Order your medications and supplies
Do not wait to buy your post op supplies at your destination. Pack a 14 day extra supply of your regular medications. This accounts for travel delays. Buy your gauze, medical tape, and compression stockings now. Having these items in your suitcase provides peace of mind.
Secure your fit to fly clearance
Talk to your surgeon about the specific timeline for your return flight. Different procedures require different waiting periods before it is safe to be in a pressurized cabin.
Planning for the weeks ahead
Mid term actions bridge the gap between your surgery and your long term recovery back in the United States.
Set up your US follow up care
Identify a local doctor who is willing to manage your aftercare. Many US clinicians are hesitant to take on patients who had surgery abroad. Secure this agreement before you leave. Share your surgeon’s contact details with them.
Arrange telemedicine check ins
Confirm that your foreign surgical team offers video consultations after you return home. Most successful recoveries involve a week one digital follow up. Ensure you have the necessary apps installed on your phone.
Review customs and border protection rules
The rules for bringing medications back into the USA are strict. You must declare all medications. Keep them in their original pharmacy containers. If you have more than 50 dosage units of a controlled substance, you need a written prescription or a letter from your doctor.
Preparing for the unexpected
Contingency planning is not about being pessimistic. It is about being prepared.
Activate your evacuation insurance
Keep the 24/7 hotline number for your insurance provider in your phone. Know the specific steps required to trigger a medical repatriation.
Create an emergency contact list
This list should include your surgeon, the local US embassy, and your primary care physician at home. Include the local emergency number for your destination. In Mexico, it is 911. In many other countries, it is 112.
Monitor for complication signs
Know your thresholds. A fever over 101 degrees Fahrenheit or redness spreading more than two centimeters from the incision requires an immediate call to your surgeon.
The success of your journey depends heavily on the communication between your foreign surgical team and your US clinician. About 70 percent of experts recommend sharing your records through a secure portal like MyChart before you even depart. This ensures your home team is not flying blind if you need help after you land. The ones who fare best are those who treat their medical records like a master file.
Create a single master folder. Use a waterproof binder for paper copies of your discharge summary, operative reports, and medication schedules. Supplement this with a 64GB encrypted USB drive. Digital backups are vital if paper copies get lost during transit. This folder is your most important piece of luggage. It contains the roadmap for your recovery and the proof of the care you received.
Taking these steps reduces the risks associated with medical travel. Surgery is a major event. Doing it in a foreign country adds layers of complexity. But careful preparation simplifies the process. When you have your documents organized and your supplies packed, you can focus entirely on healing. You are taking a proactive role in your health. This diligence supports a much safer and smoother return to your daily life in the USA.
References
- Medical Tourism Statistics and Facts (2025) – Market.us Media — Medical Tourism in the United States · Around 1.9 million inbound medical tourists annually. · Top procedures sought include cardiac surgeries, orthopedic …
- U.S. Medical Tourism Market Size | Industry Report, 2033 — The U.S. medical tourism market size was estimated at USD 8.74 billion in 2024 and is expected to reach USD 9.86 billion in 2025. What is the U.S. medical …
- U.S. Medical Tourism Market Size, Share & Trends [2030] — The US medical tourism market size was worth USD 4.58 billion in 2022 and is projected to grow at a CAGR of 21.0% during the forecast period.
- What Drives the Medical Tourism Market in 2025? – Shortlister — In 2024, the market reached an impressive 84.92 billion and is projected to surpass 239.37 billion by 2029, reflecting a substantial compound annual growth rate …
- Medical Tourism Trends among Americans in 2025: Top Destinations — Medical tourism is developing very fast — about by 25% annually according to IMTJ (International Medical Tourism Journal) …
- Medical tourism on the rise – World Health Expo — Valued at US$30.5 billion in 2024, the market is projected to grow from US$35 billion in 2025 to US$142 billion by 2034, expanding at a robust …
- U.S. Medical Tourism Market Growth & Innovations – 3B Healthcare — From 2025 through the early 2030s, projections suggest a compound annual growth rate (CAGR) between 6% and 13%. By 2032, the market could reach …
- Medical Tourism | Yellow Book – CDC — Medical tourists from the United States most commonly travel to Mexico, Canada, the Caribbean, and several countries in South America.
Legal Disclaimers & Brand Notices
The information provided in this article is for informational and educational purposes only and does not constitute professional medical advice, diagnosis, or treatment. Always seek the advice of a qualified healthcare provider regarding any medical condition, surgical recovery, or medication regimen. Never disregard professional medical advice or delay in seeking it because of something you have read in this content.
All product names, logos, brands, and registered trademarks mentioned herein are the property of their respective owners. All company, product, and service names used in this article are for identification purposes only. Use of these names, logos, and brands does not imply endorsement or affiliation.